# Wait for Chat (RWC)
Use this step to start a Rich Web Chat conversation. You set up the chat ID and activate the flow. When the chat URL is opened, the flow proceeds down the next exit.
# General settings ⚙️
App name is a name of the chat in OneReach.ai App. The value is required at the moment of chat setup. App name doesn't require to be unique and can contain any symbols within a limit of 100 characters. App color can be selected from palette and will be shown in OneReach.ai App for your chat.
Chat ID is part of the RWC URL that must be unique throughout your OneReach.ai account. This value is generated by default, is limited to 100 characters and cannot include spaces or any special characters except :^~?<>|&%.'#[]+=„"{}. Chat ID should be in lower case, so if it's set in upper case, error message will be shown and Chat ID will be transformed to a lower case. If you want to generate a new chat ID, you can click on a button right next to the chat ID input.
TIP
if App name or Chat ID are empty, flow saving and activation will fail. Check that inputs are filled once the step added to flow tree
RWC URL is generated after the flow is activated. Options to copy the full RWC URL or open the chat in a new window become available.
| Before activation | After activation |
|---|---|
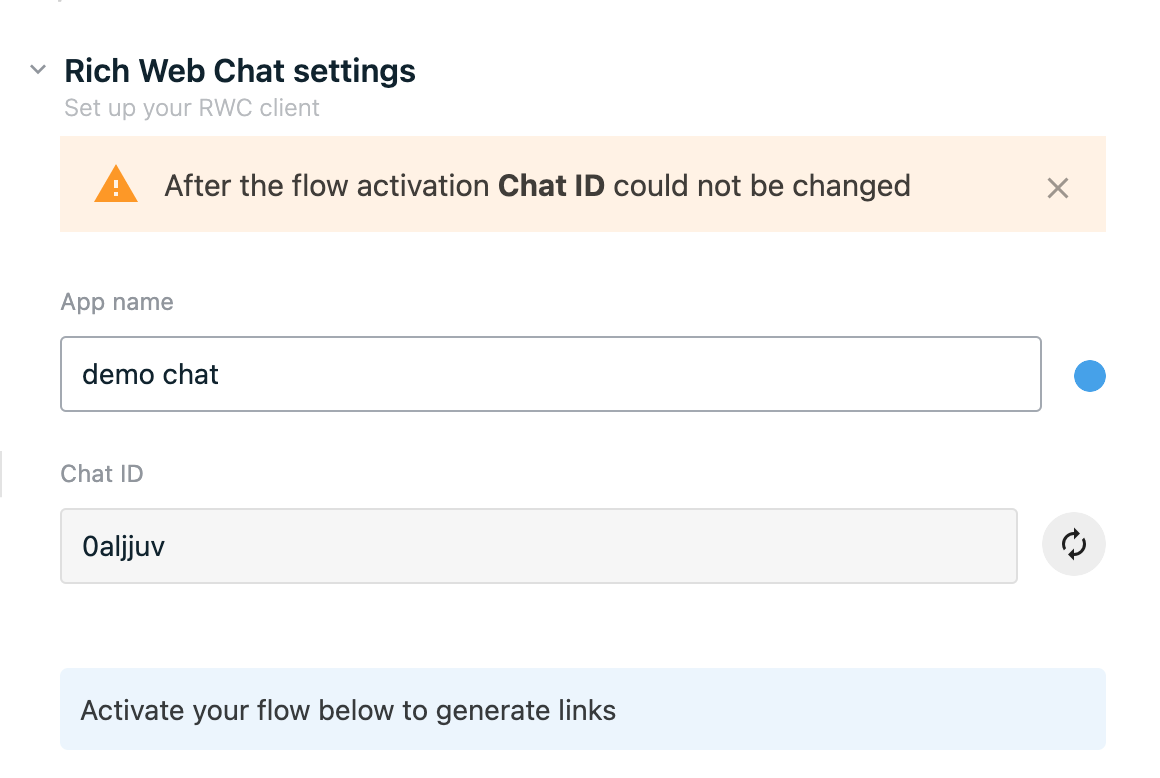 | 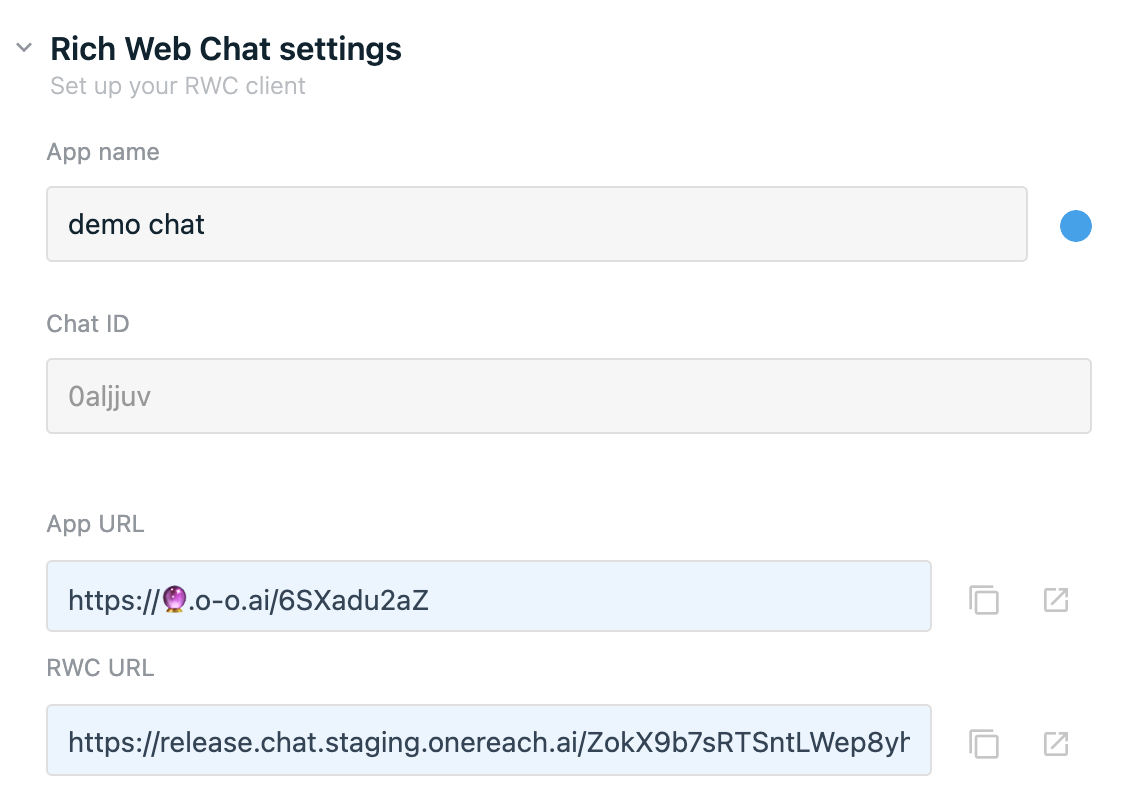 |
TIP
Note that Chat ID should be unique throughout your account, otherwise the flow activation will be failed.
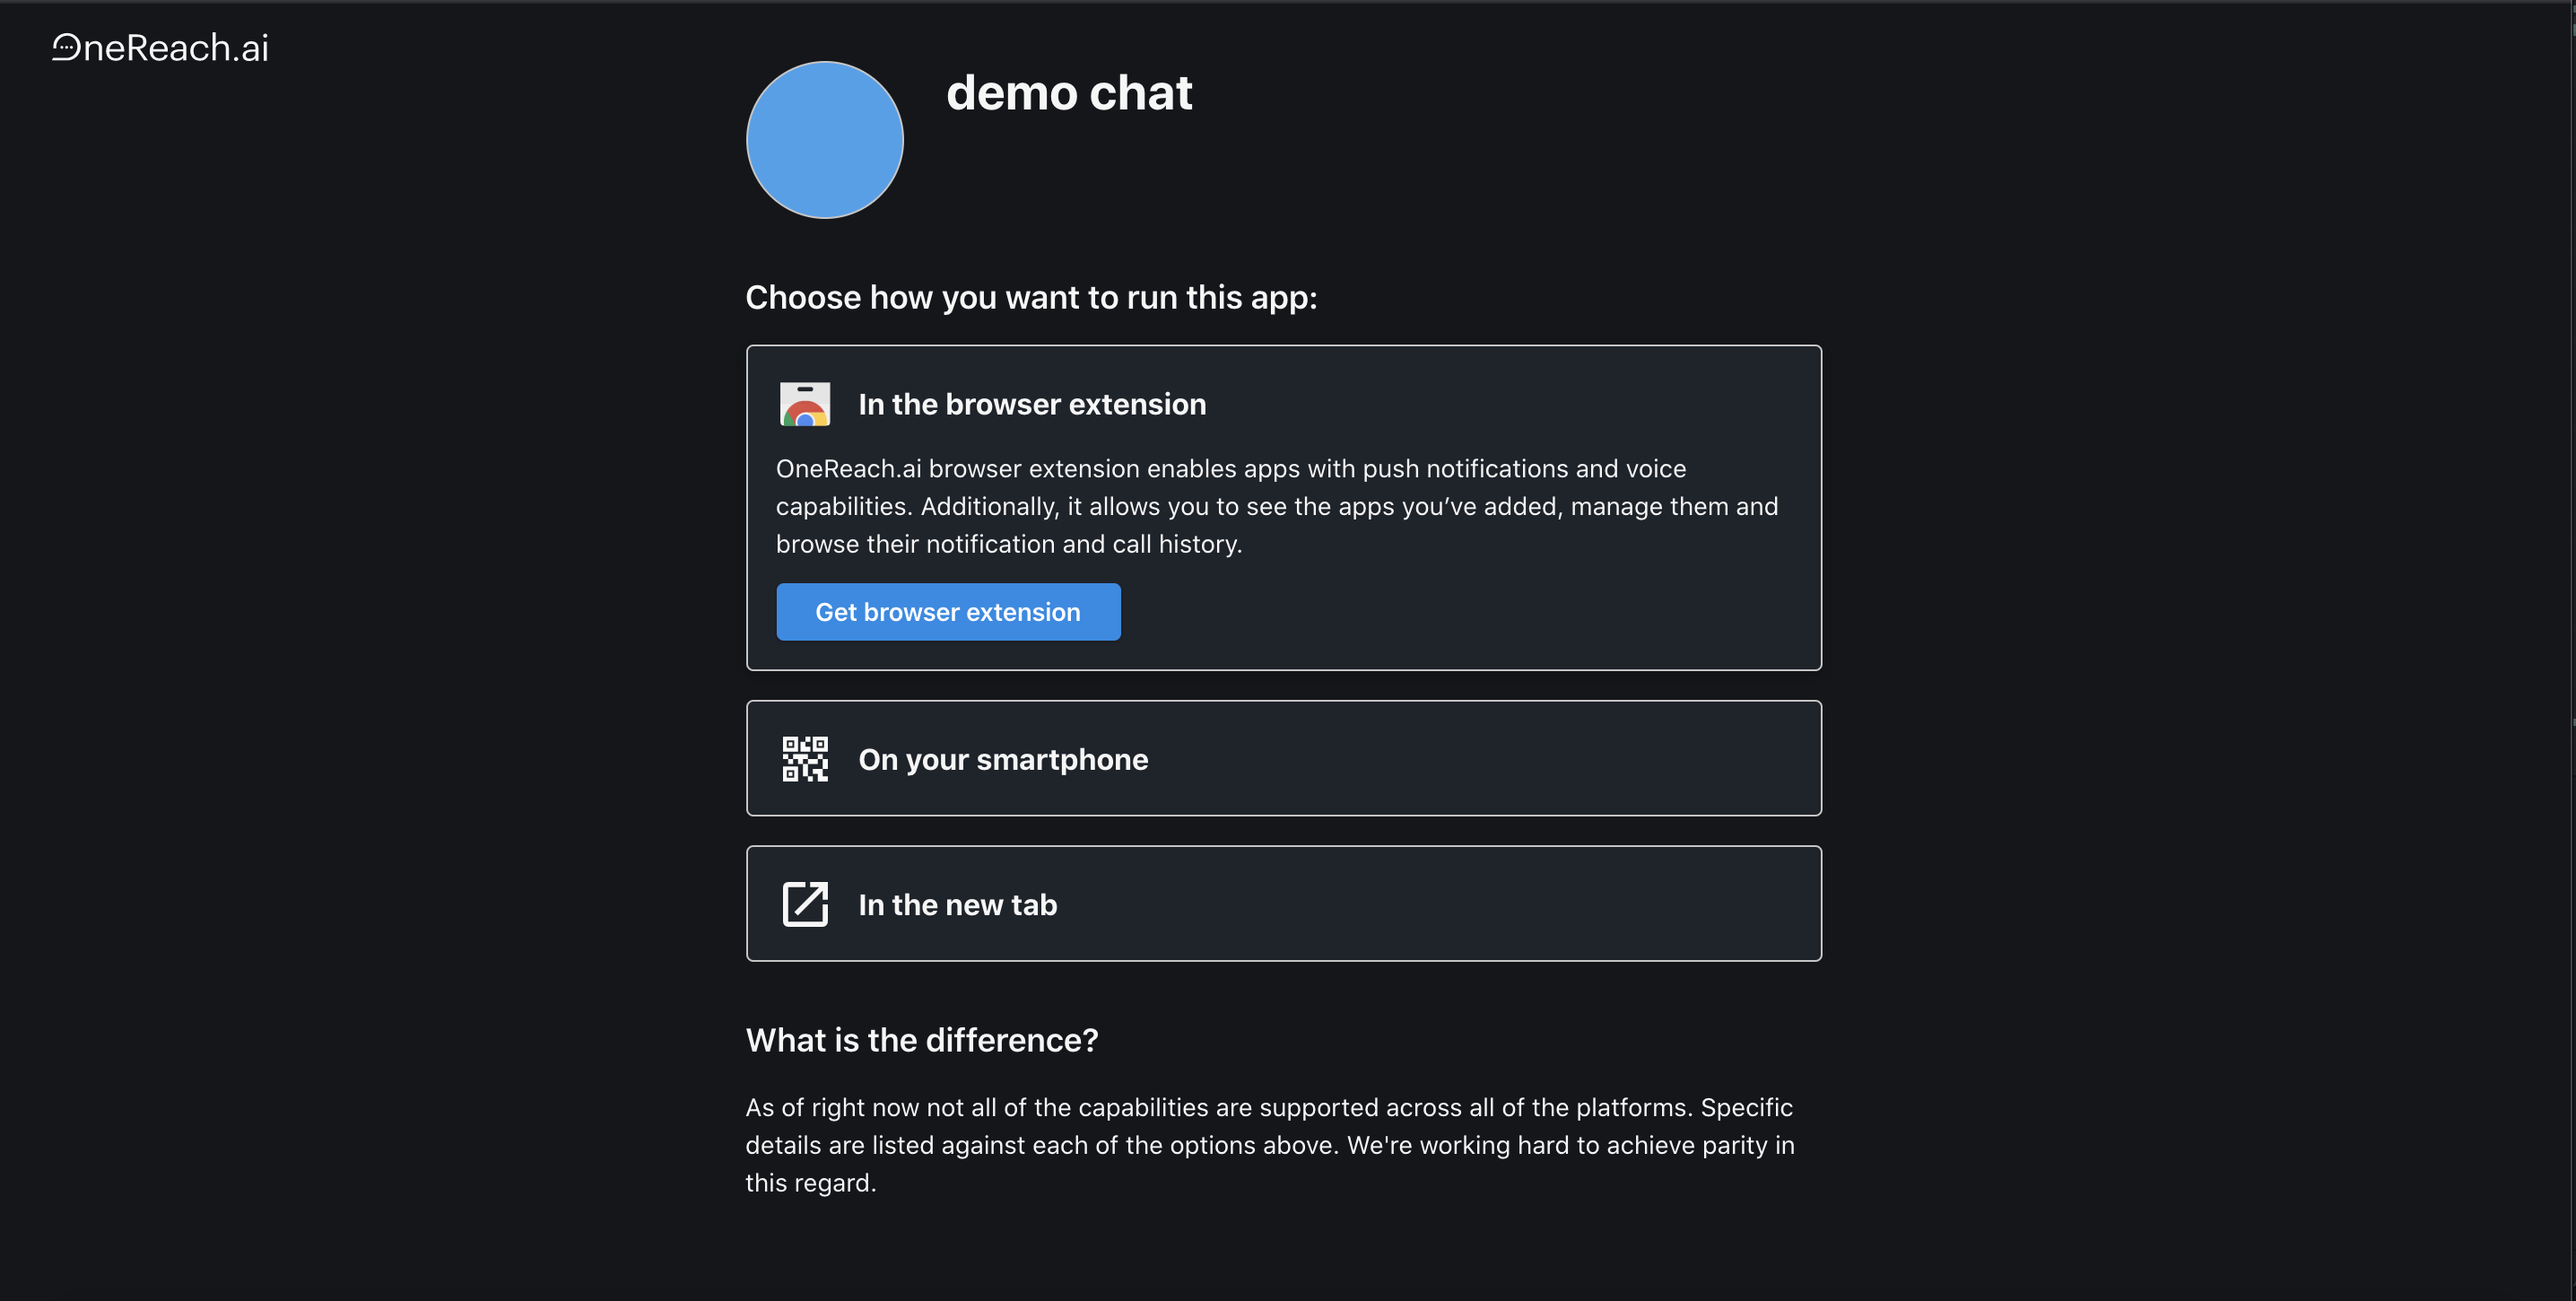
App name and App color could be changed after a flow saving or activation. When flow is active, App URL and QR code (that also contains App URL) will be generated and lead to OneReach.ai App landing page, so end-user could proceed with chat to desktop view or app view.
# Look and feel 🎨
You can customize the UI and logic of your chat. Most setting are defined in Look and feel group, some settings for pro-users are added to collapsible Advanced settings.
# Chat appearance
The group contains settings, related to general chat look in all view.
# Theme
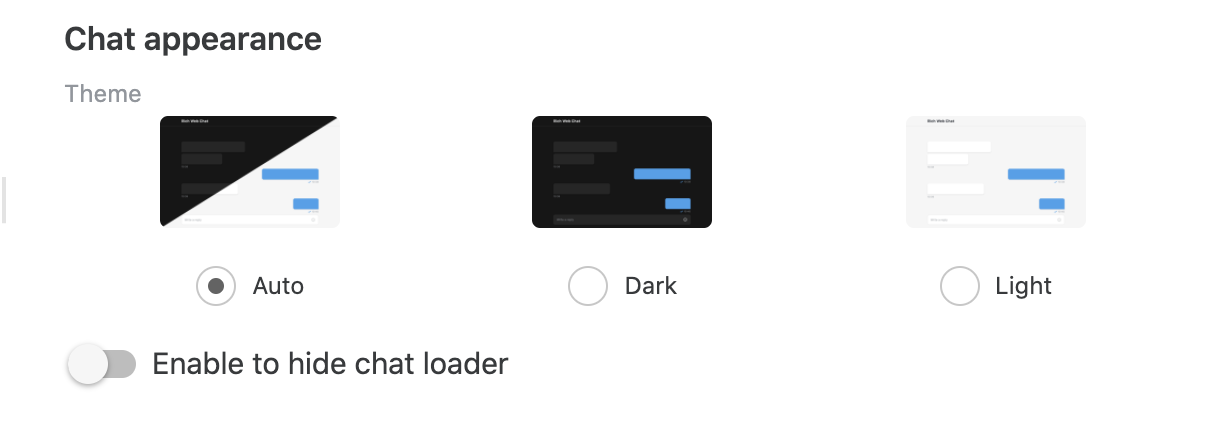
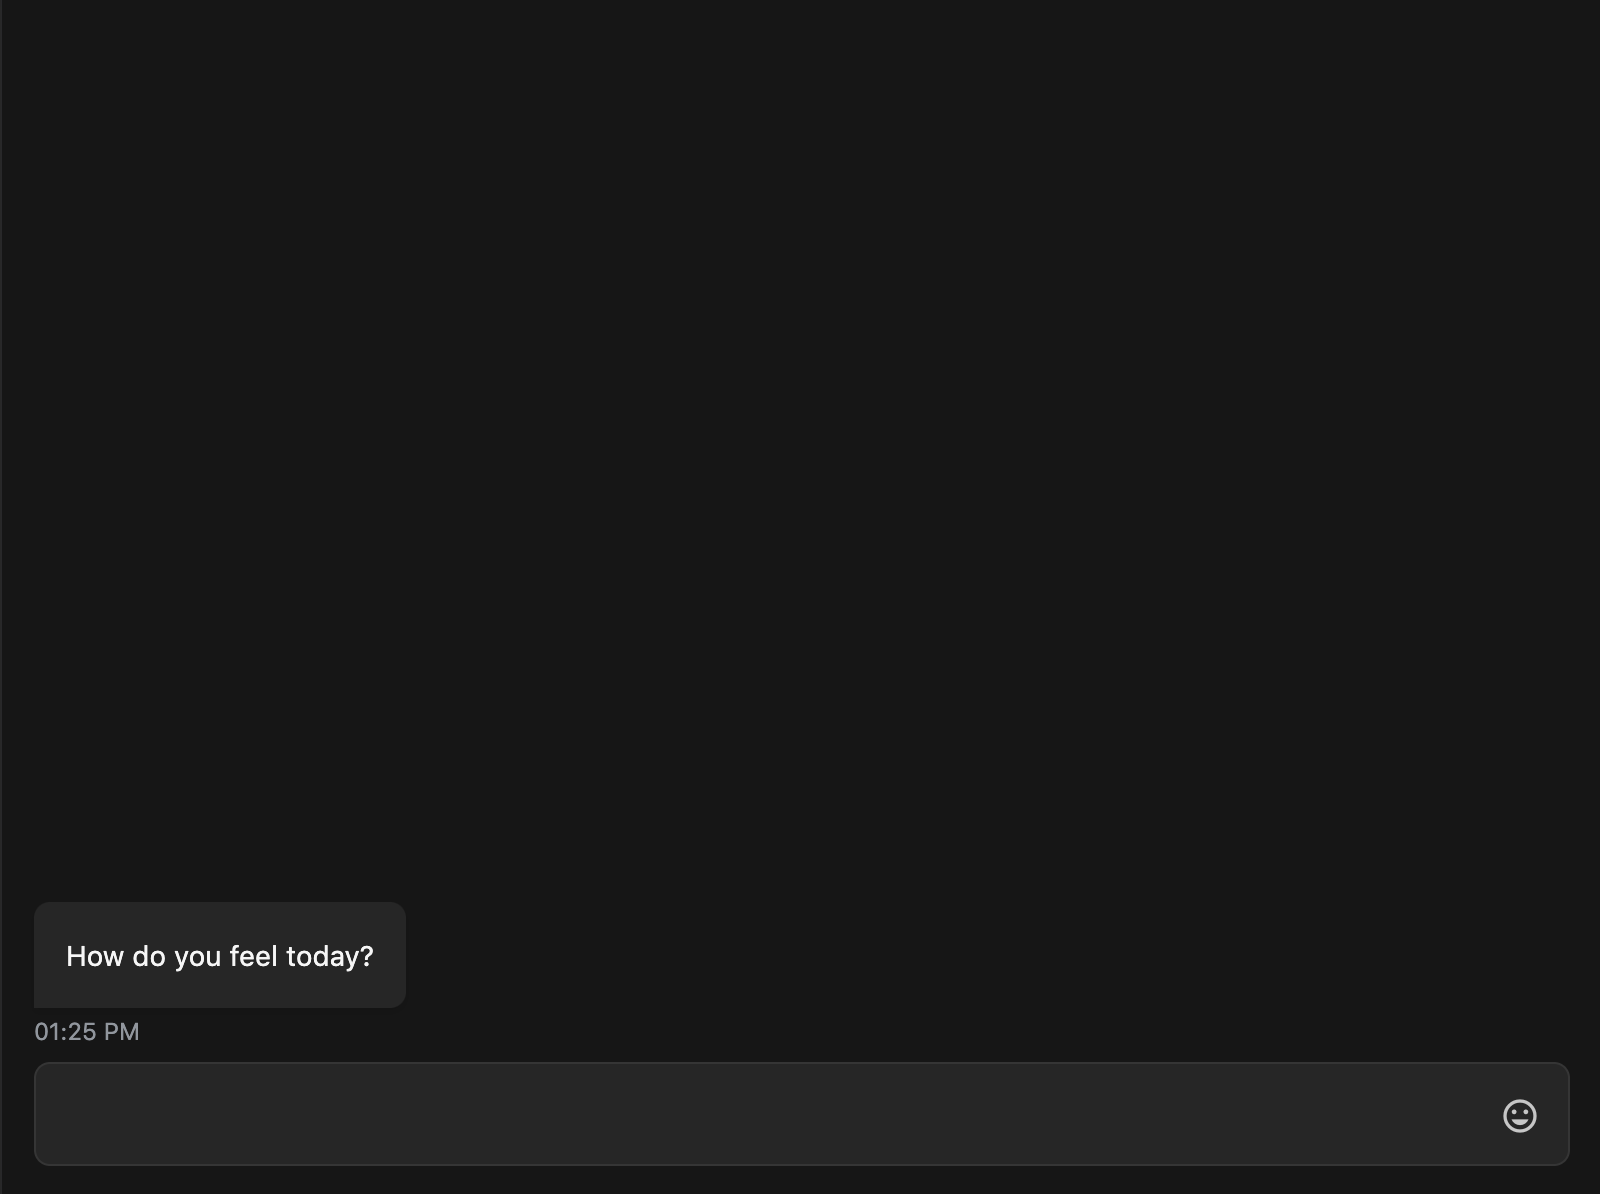
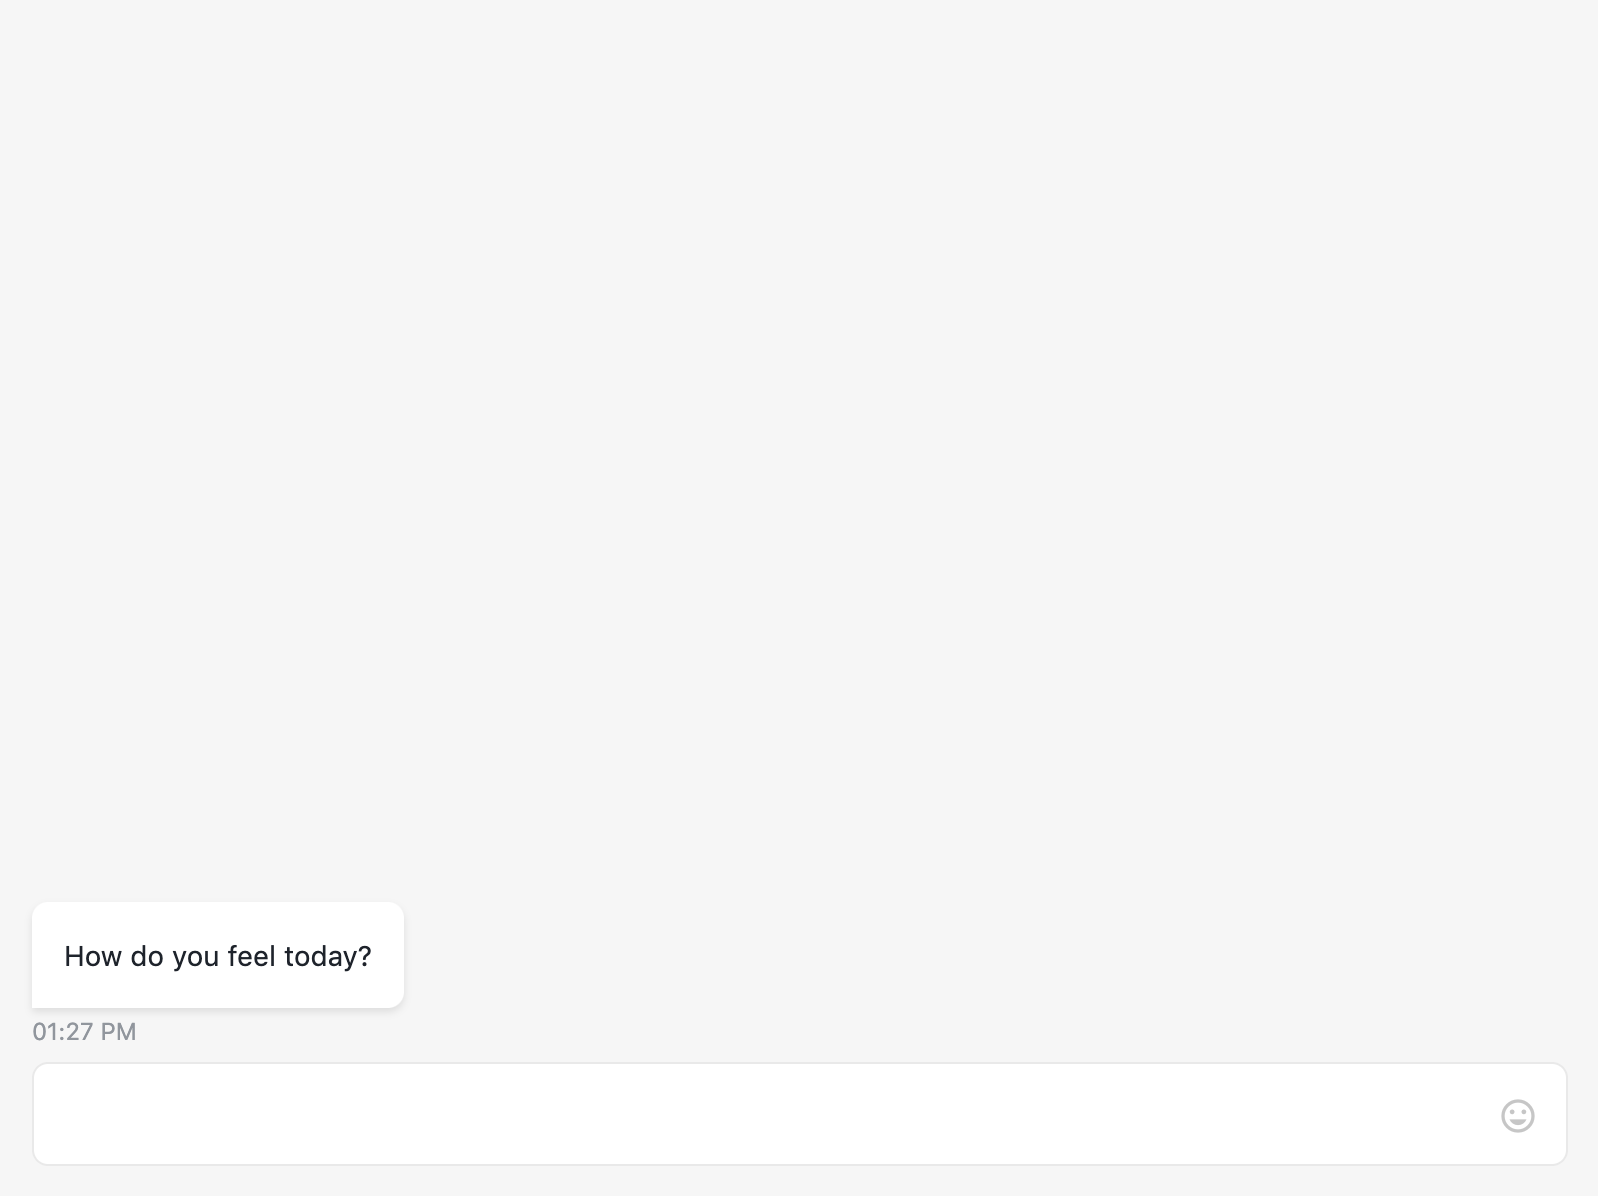
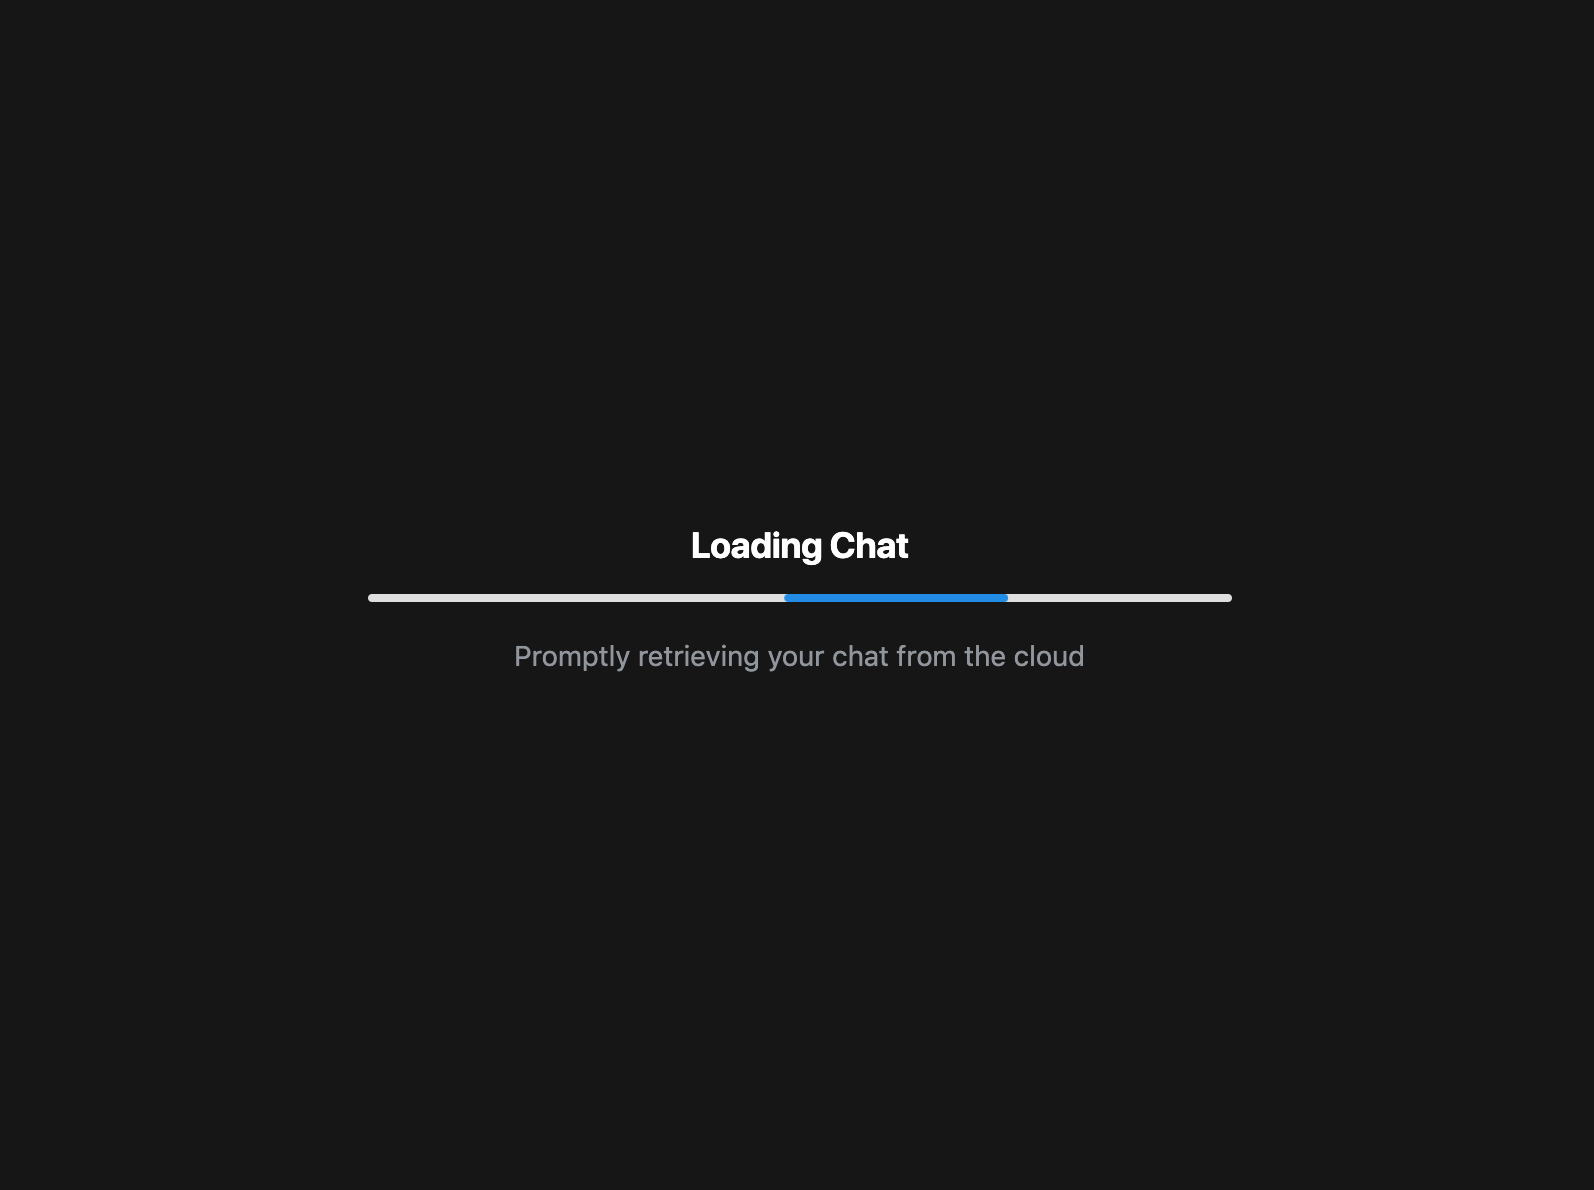
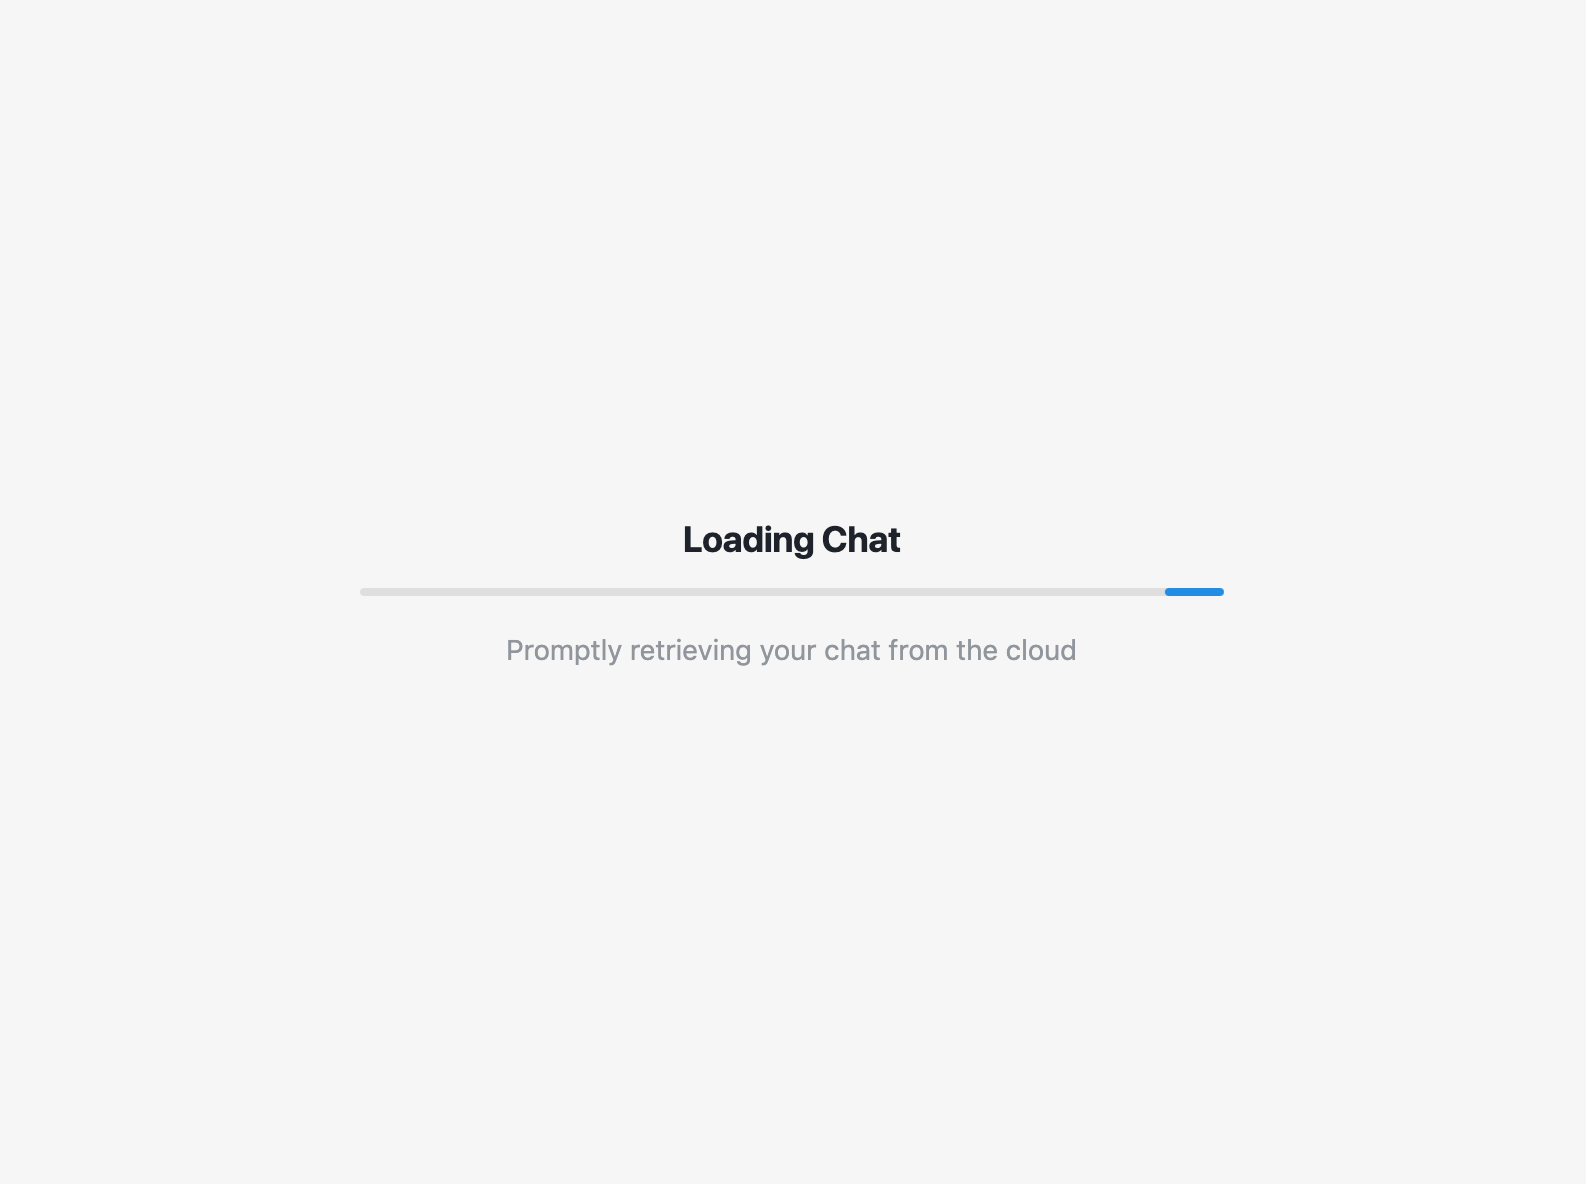
Theme selection is available between auto, dark and light and it applies to all chat views (browser, embedded, app). By default auto theme is set, so end-user's browser/device theme will be detect to launch the chat with an appropriate theme. Selected theme applies for chat loader with the same logic. If dark or light theme is selected, RWC URL will be appended with parameter: ?loader=light or ?loader=dark, so if it's changed manually in URL, the loader will be shown in set theme, independently to browser settings.
| Dark Theme | Light theme |
|---|---|
 |  |
| Dark Theme | Light theme |
|---|---|
 |  |
When the toggle to hide chat loader is ON, the loader won't be shown on chat launch and RWC URL will be updated with parameter ?loader=hidden.
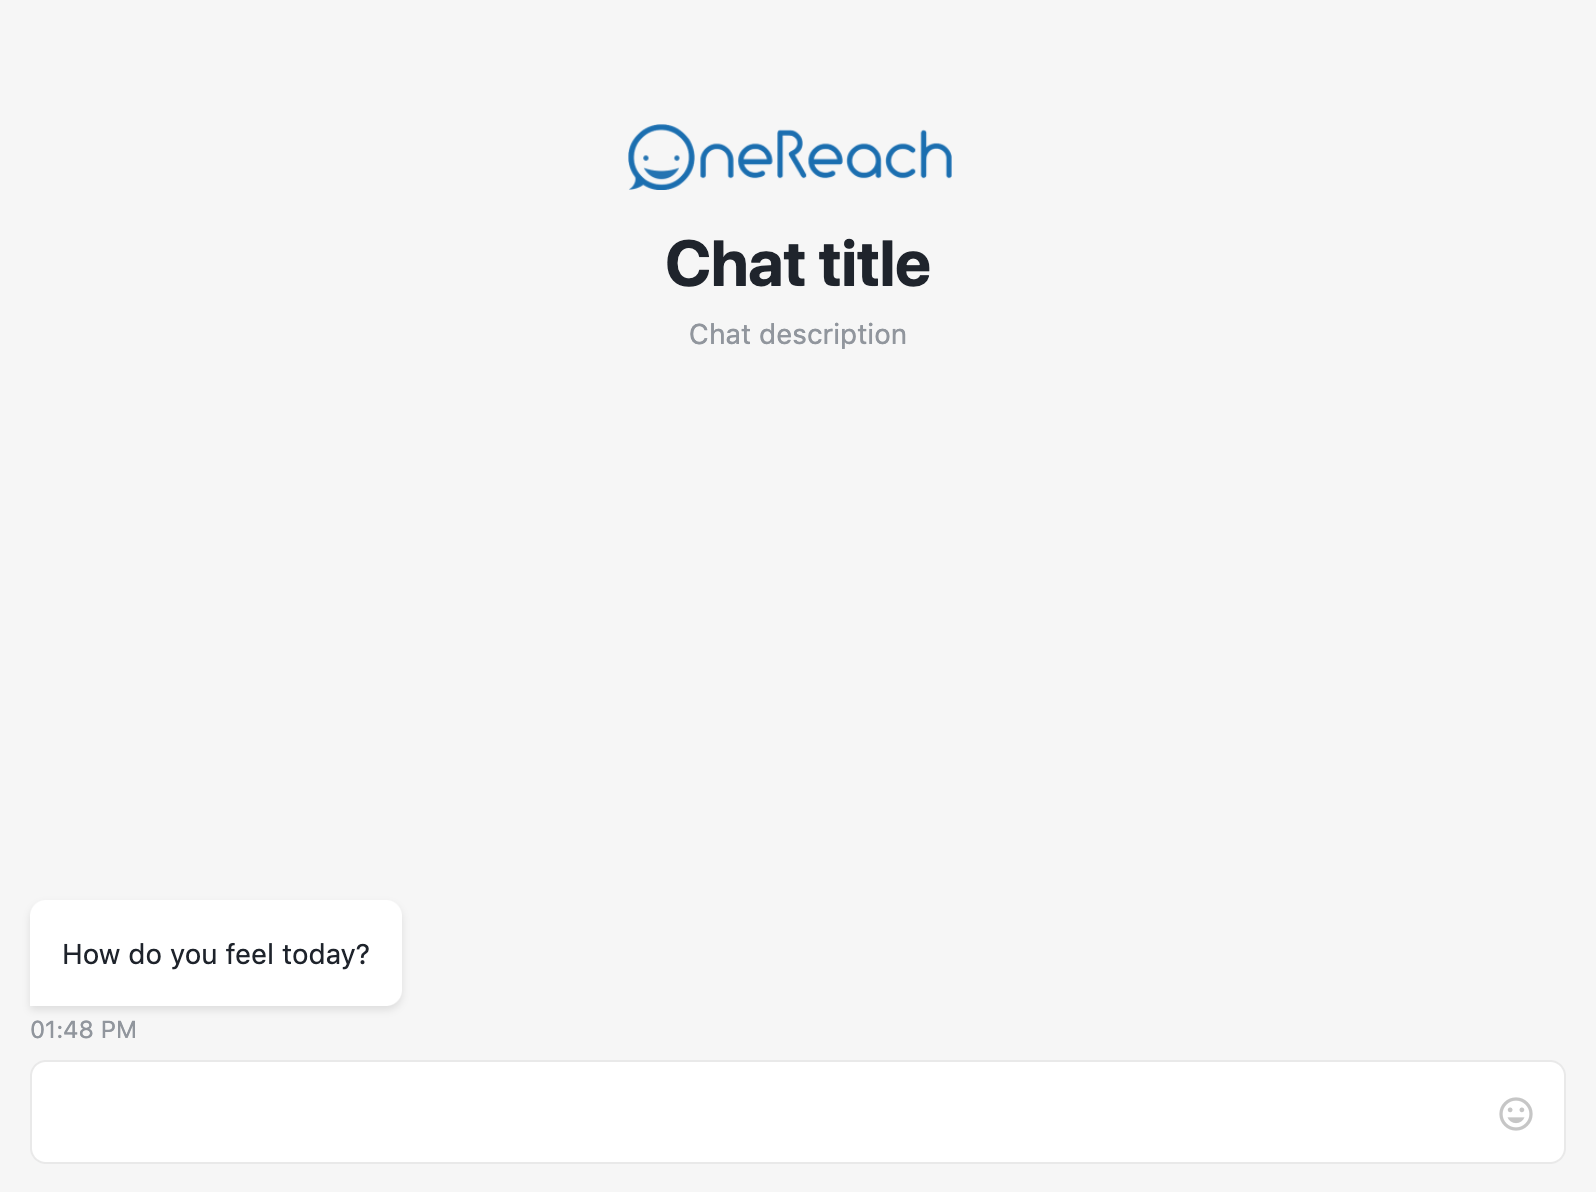
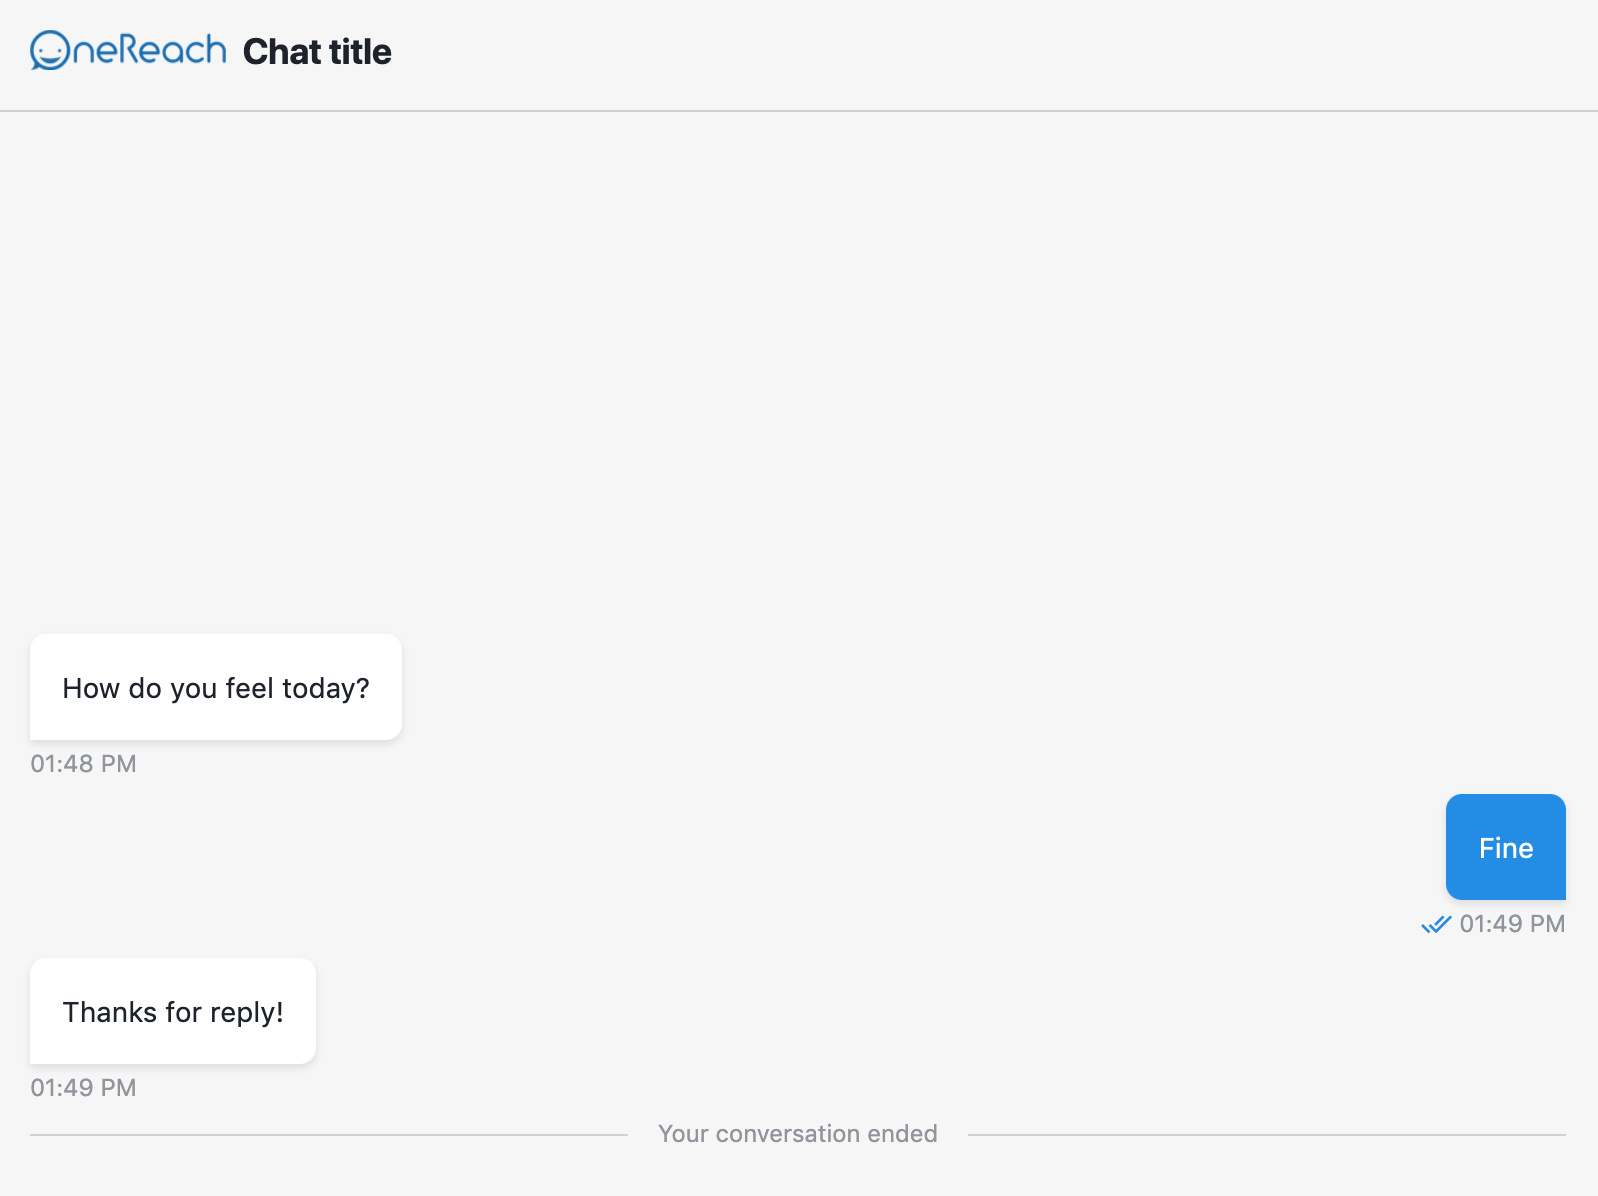
# Chat title, description and header image
Both title and description can be set manually or left empty. If either value is too long, it will be truncated. The length depends on the device the visitor used to start the conversation, so make sure it is below the suggested user-friendly character limits:
- mobile (vertical): title 35 ch, description 300 ch.
- desktop (horizontal): title 100 ch, description 700 ch.
The chat header image can be chosen from Files or set as an URL.
Note, that description will be visible to the end-user only until the first user message is sent.
| Default | Minimized |
|---|---|
 |  |
# Bot icon
Bot icon is an image that will appear next to the bot message. Image can be chosen from Files or set as an URL. Bot icon will be applied to all messages in history, even if messages were recieved without bot icon or with another bot icon image.
![]()
TIP
When using Cards or Text, if it doesn't have text message or attached file, bot icon won't be shown.
TIP
When using Custom template component, bot icon might be hidden with turned off toggel 'Enable to show bot icon for the message'.
# Chat settings
The group contains settings, related to general chat behaviour.
# Show typing indicator while processing user answer and Bot answer delay duration
To show typing indicator while flow processes other steps/threads, turn ON the respective toggle Show typing indicator while processing user answer. When the toggle is ON, chat messages will arrive without delay.
When the toggle is OFF, custom delay for typing indicator can be set manually in appeared input bot answer delay duration.
The bot answer delay duration is the time that the step waits before proceeding down the next exit. The end-user will see a typing indicator during this period. The value is set at 2 seconds by default and its limits are between 0s and 2min. Examples of acceptable time formats: 1m 12s or 72s.

# Allow user to view conversation history
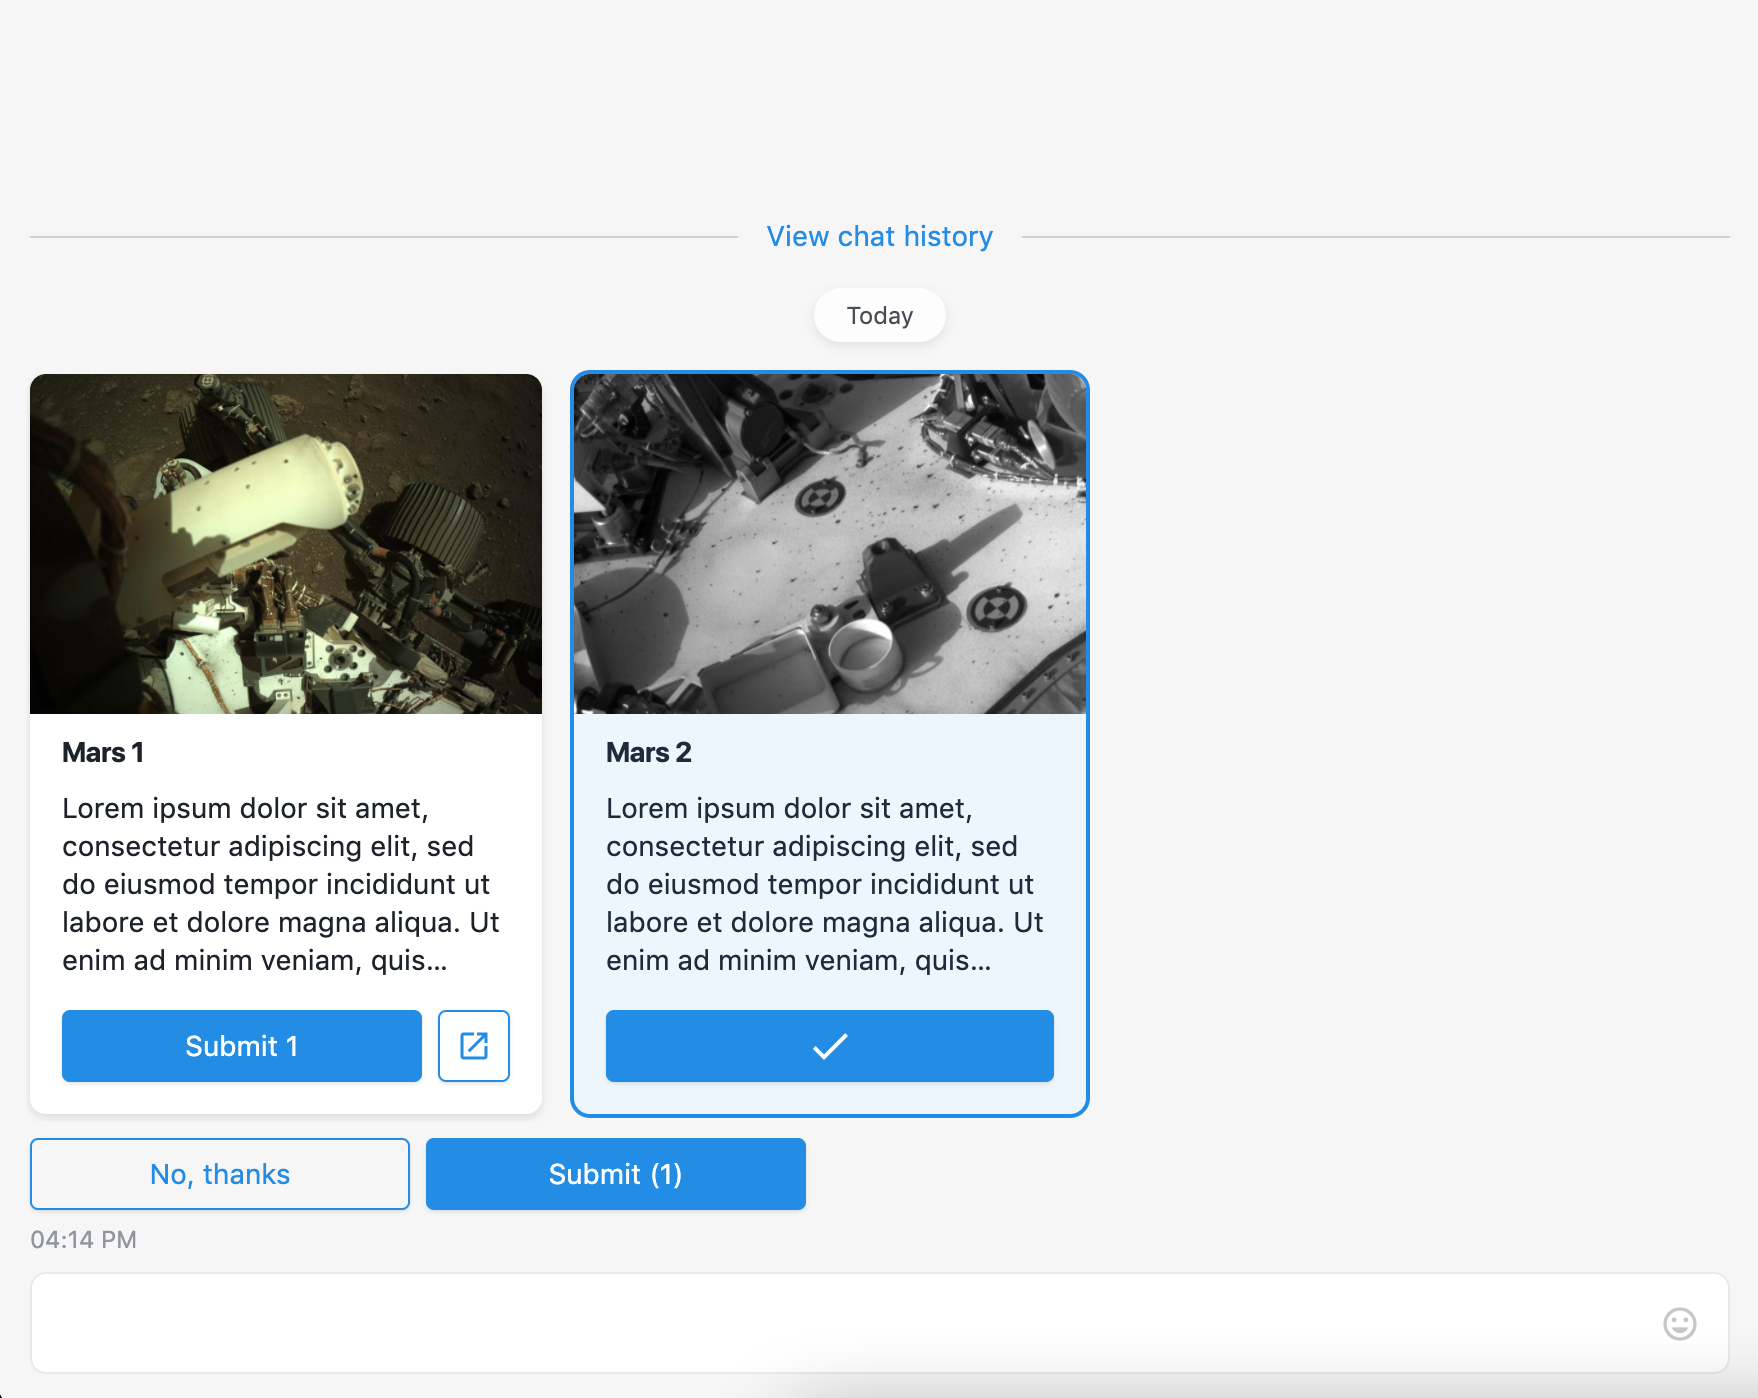
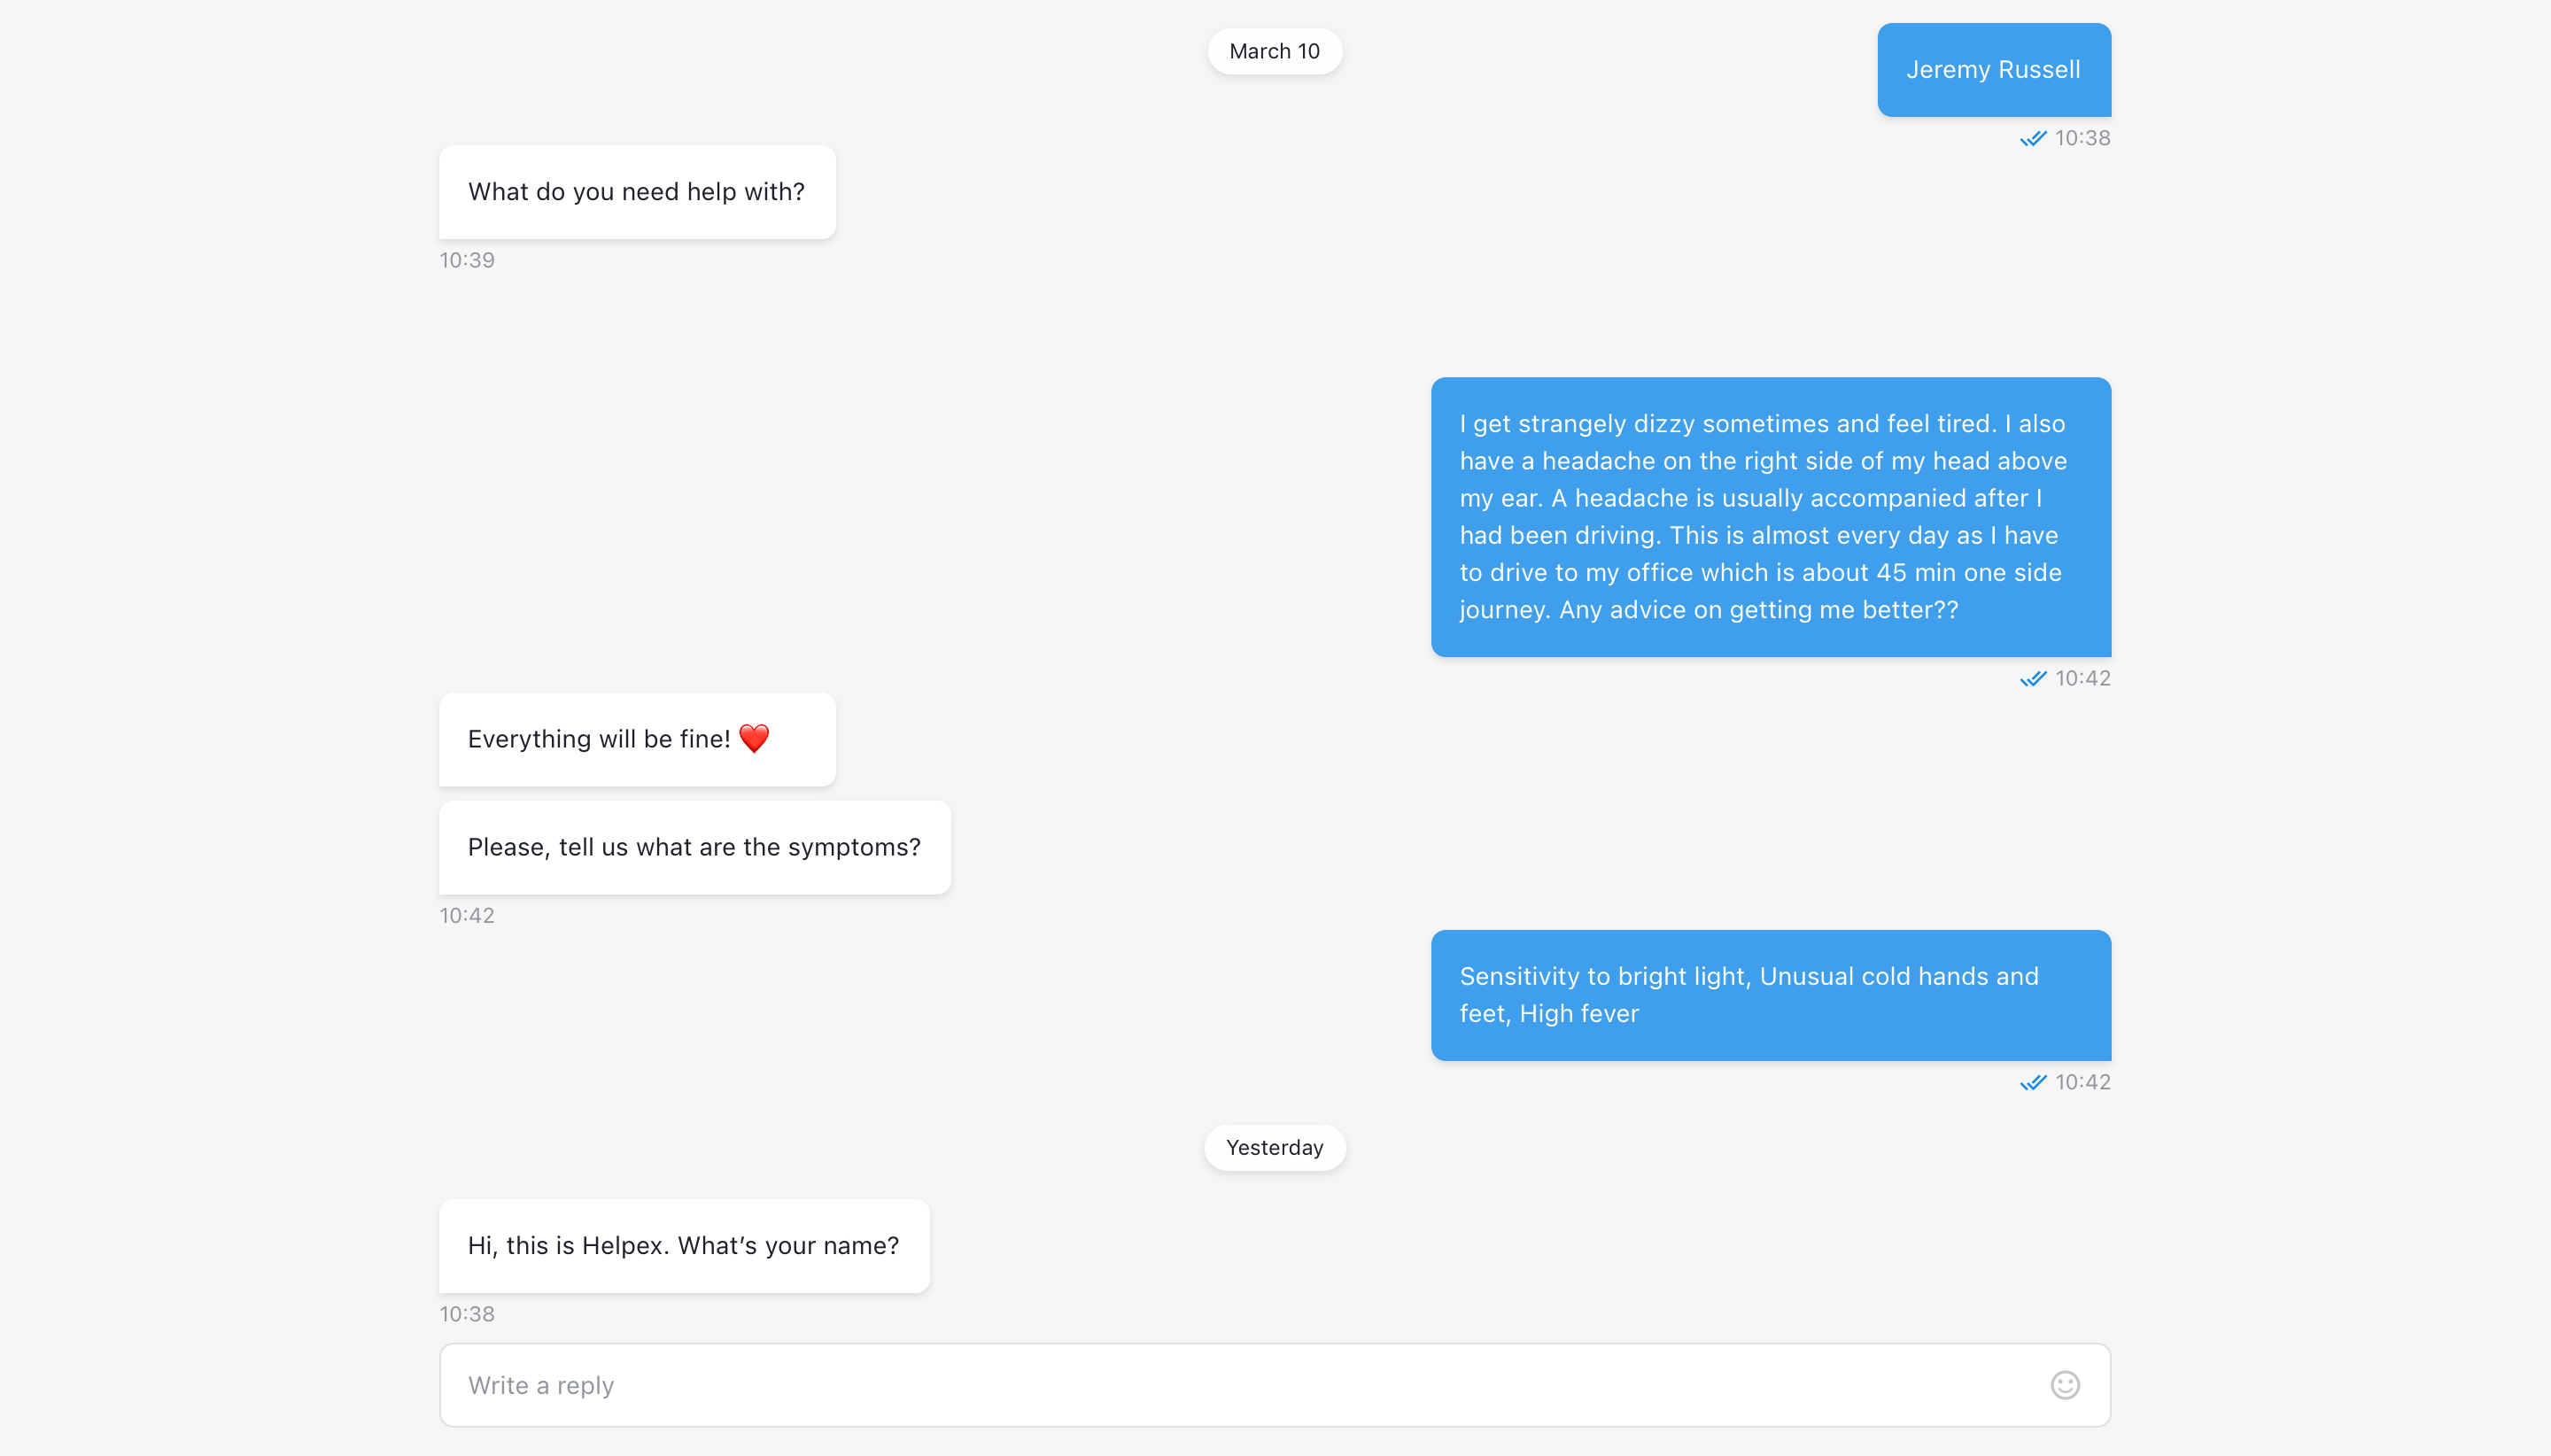
To provide the user with an option to view chat history, turn on the respective toggle. The history is stored in the cache from the first chat URL loading independantly on toggle state. When toggle is ON and end-user initiates the chat, a button to 'View chat history' will be present with All conversations divided into days.
| History button | Expanded history |
|---|---|
 |  |
# Day indicator
Along with history, day indicator is present in chat and it shows the day messages were received. Day indicator is shown only when toggle to view conversation history is ON and chat session is stretched to a next day. Day indicator examples: Today, Yesterday, 06 September, 05 September 2015.
# Allow to continue interrupted conversation or start a new one
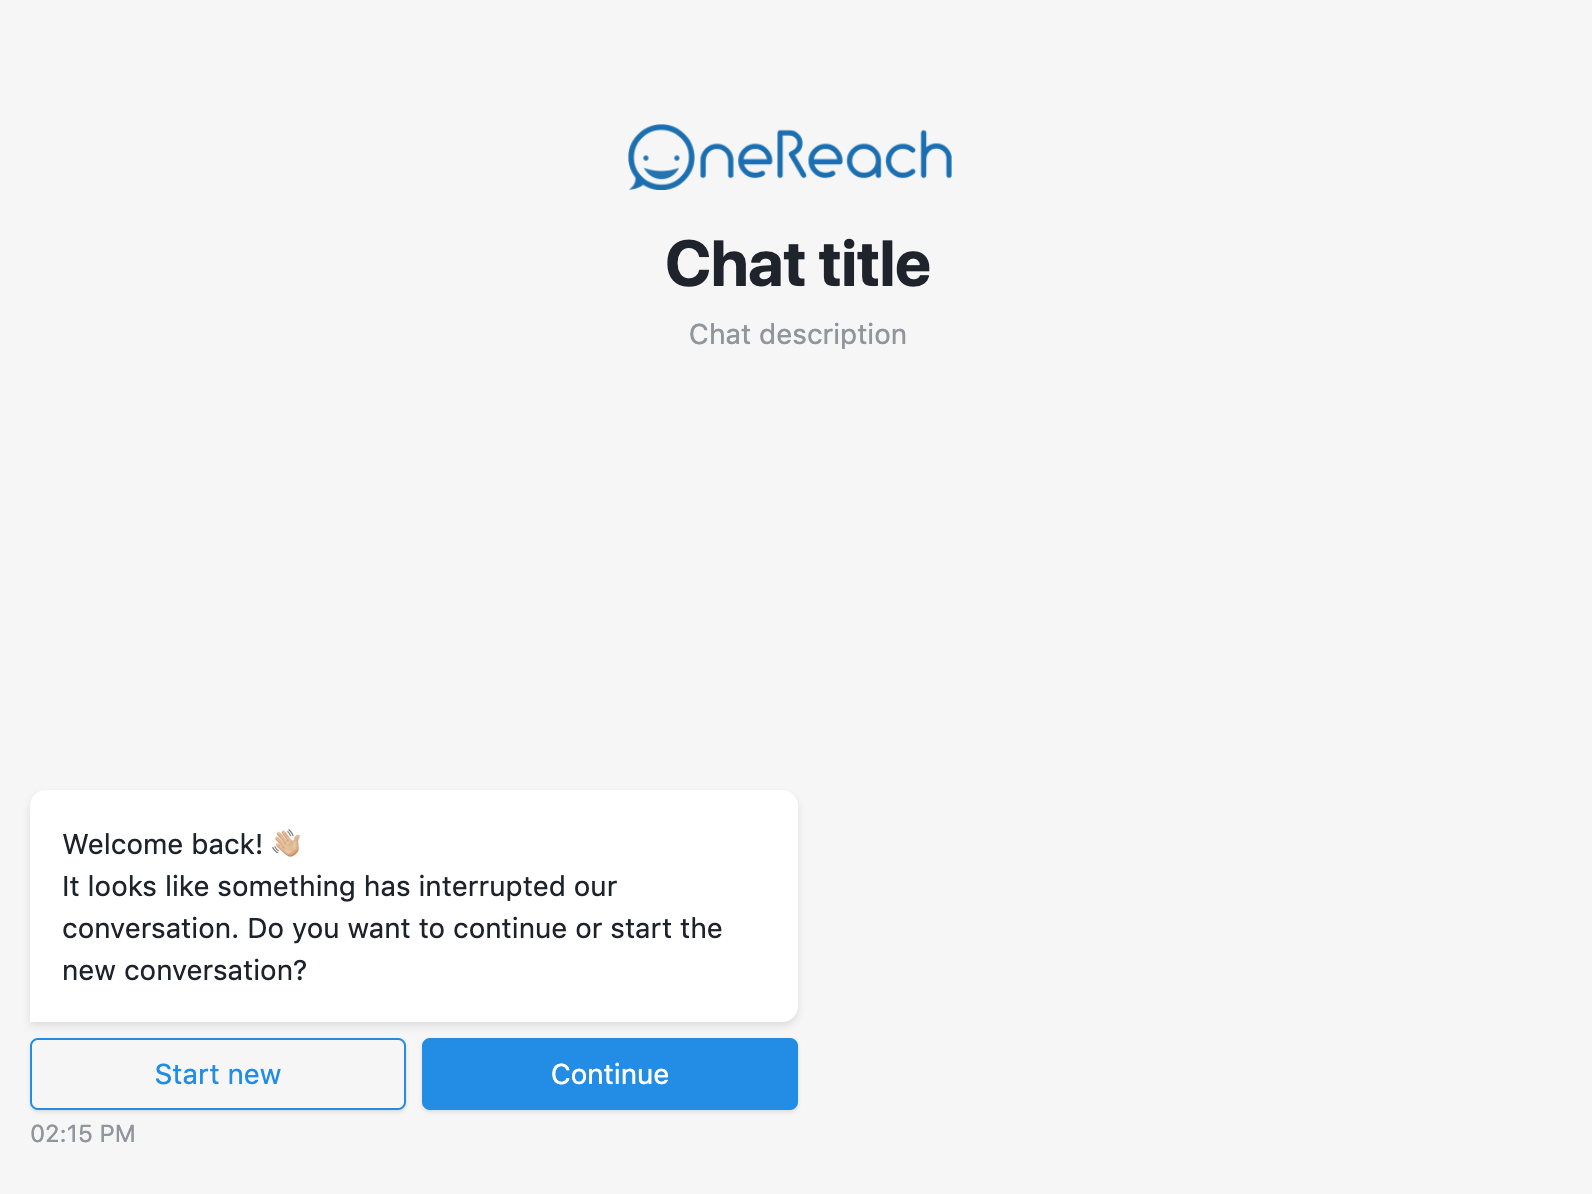
If end-user did not finish the previous conversation (due to browser page reload, etc.), he will be able to continue it or start a new one. The predefined message will be shown after the page reload.
TIP
If conversation was finished due to flow end or timeout, the message won't appear.
# Allow starting a new conversation when the flow ended
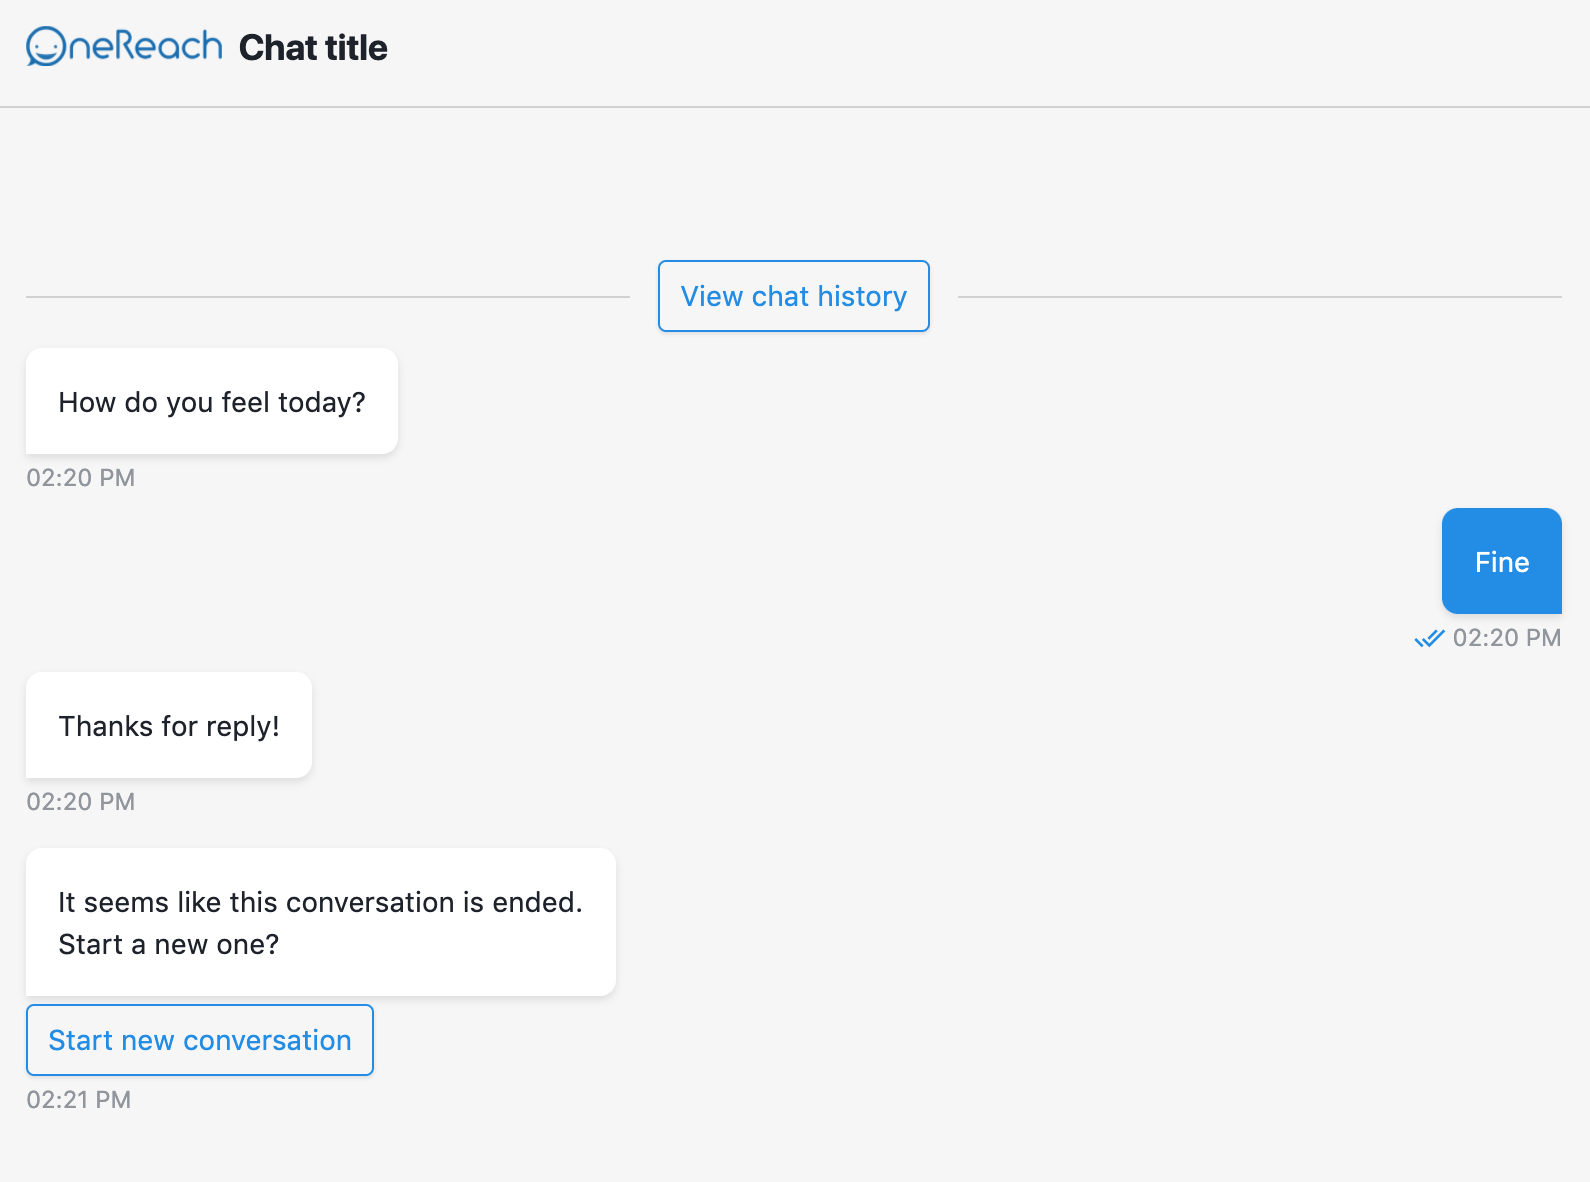
Turn the toggle on to send predefined message to start a new conversation when the flow was ended or timed out. If the toggle is turned off, the label will appear at the end of chat conversation Your conversation ended, so to restart conversation end-user should manually reload browser page.
# Customize browser tab
The option provides an ability to change the name of a browser tab when it's in focus and out of focus. It creates visual screen changes, that grab end-user's attention.
# Default tab name
New value replaces default name of chat browser tab. By default and if empty, tab name 'OneReach.ai Chat' will appear.
# Custom favicon
Allows to change default favicon icon (opens new window) in browser tab. Preferable images with .ico extension, but not required.
WARNING
Custom favicon is not supported by Safari browser
# Changed name, when tab is out of focus
The toggle allows to enable option to set different browser tab name and customize it, when the tab is out of focus.
# Changed tab name
Changes browser tab name when user lost focus from the chat tab.
# Change interval
Defines interval after which browser tab changes it's name to Changed tab name text. Set 0s to show only changed tab name. Examples of acceptable time formats: 1m 12s or 72s.
# Embedded chat customization💬
Add an embedded chat window to your website so end-users can quickly get answers to their questions by chatting with a bot while browsing your site. The chat window sits unobtrusively on your web page. When customers want to chat, they just click the button to launch the chat.
End-user can start chatting while viewing your web page and minimize/maximize the chat window or change it's position, so it’s not in their way.
# Widget settings
The group allows to setup embedded chat in initial view - as a widget.
# Widget icon & color
By default, the widget has an icon and color, that can be changed in step. Select a custom icon from Files storage or provide an URL and change widget color with the palette.

# Widget icon & color initialization code
When modifying thumbLogo and widgetColor props in embedded chat init code, values should be:
thumbLogo- URL for image that will be inside widget buttonwidgetColor- color of widget button
Example:
{
  thumbLogo: 'https://i.vimeocdn.com/portfolio_header/566734',
  widgetColor: '#409fec',
}
# Widget location on the website
You can set position of chat widget on a website. Available options:
- Bottom right corner.
- Bottom left corner.
Depends on option, the chat window will expand properly to the left or right side.
Chat widget has fixed position on the screen and can't be dragged manually (unlike chat window).
# Widget location initialization code
When modifying position prop in embedded chat init code values should be:
bottom-rightfor bottom right cornerbottom-leftfor bottom left corner positions.
Example:
{
  position: 'bottom-right', // Bottom right corner
  position: 'bottom-left',  // Bottom left corner
}
# Widget icon animation
| Pulse | Ring | Zoom |
|---|---|---|
 |  |
# Widget icon animation initialization code
Example:
{
  animation: 'zoom',  // Zoom animation
  animation: 'pulse', // Pulse animation
  animation: 'ring'   // Ring animation
}
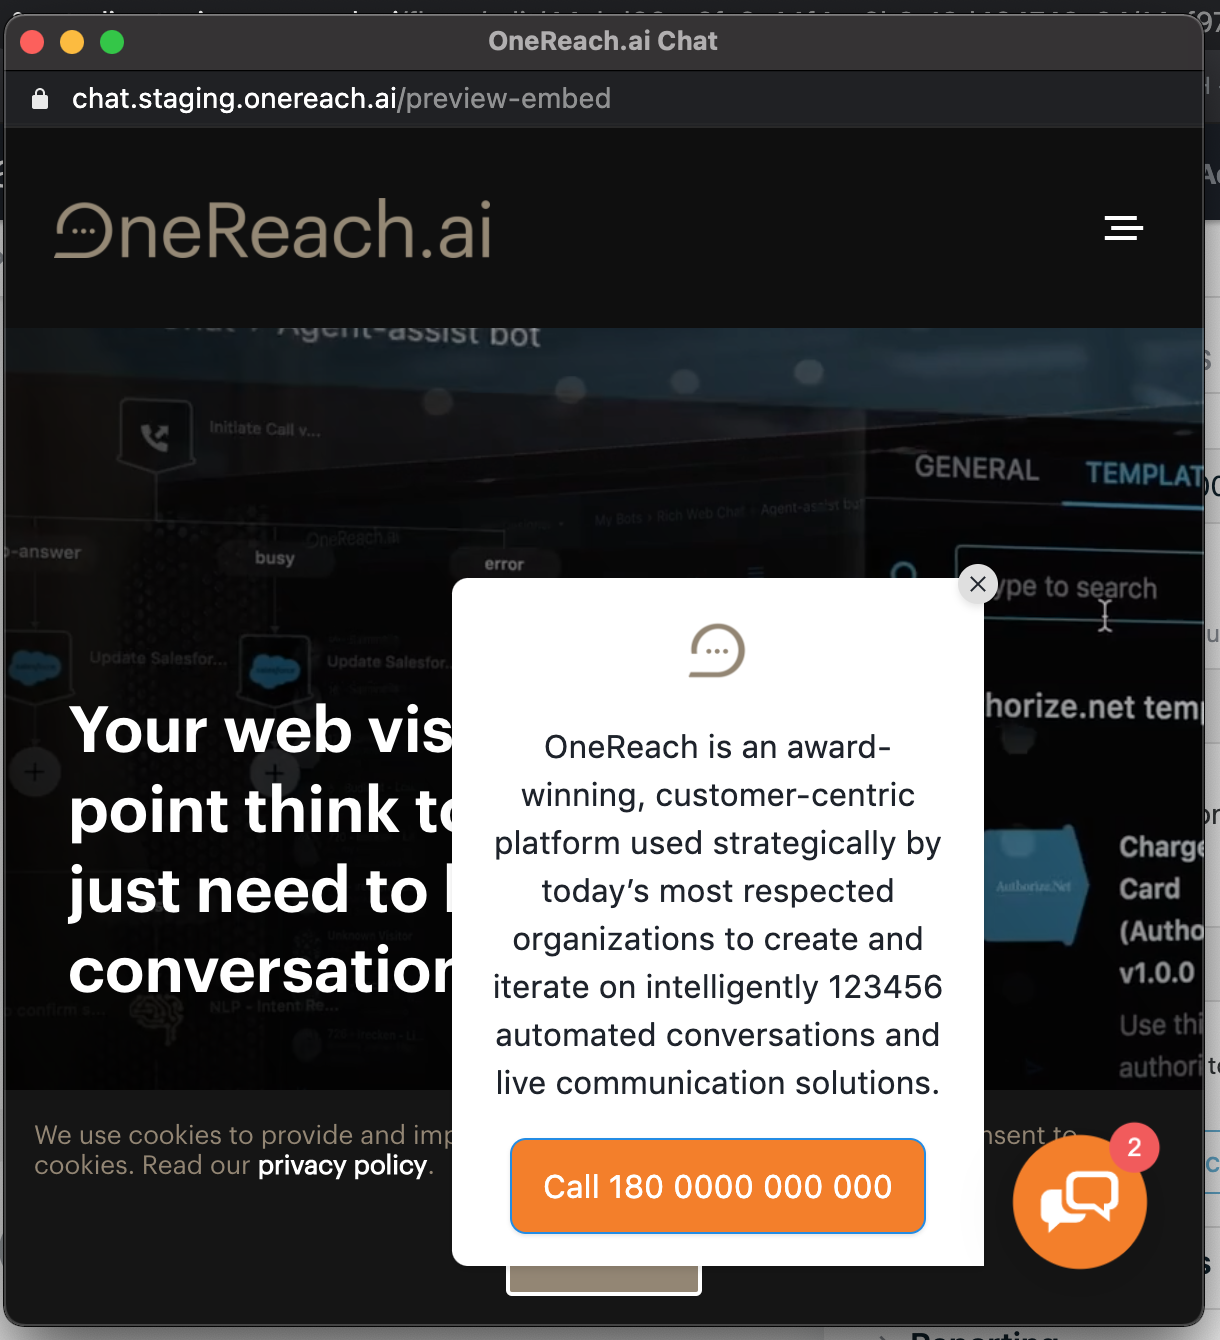
# Setup invitation message
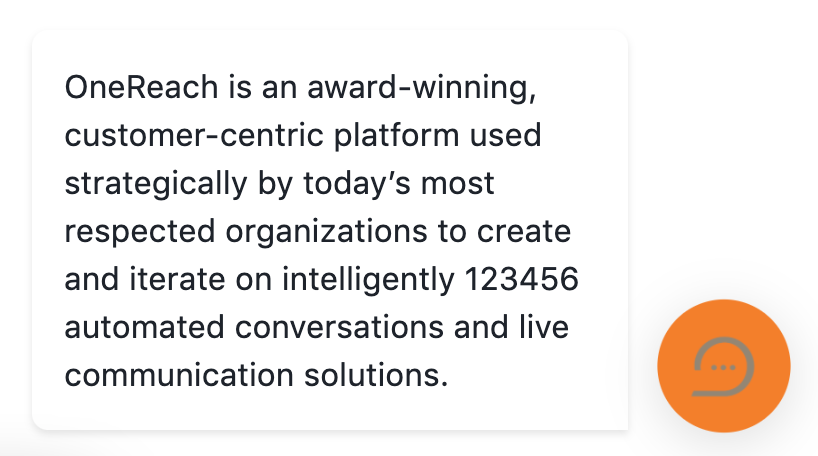
Turn On the toggle to set invitation message near widget button with some additional info for an end-user.
# Text
Text that will be shown in invitation popup.
# Invitation message initialization code
Example:
{
  inviteMessage: 'OneReach is an award-winning, customer-centric platform used strategically by today’s most respected organizations to create and iterate on intelligently 123456 automated conversations and live communication solutions'
}
# Image
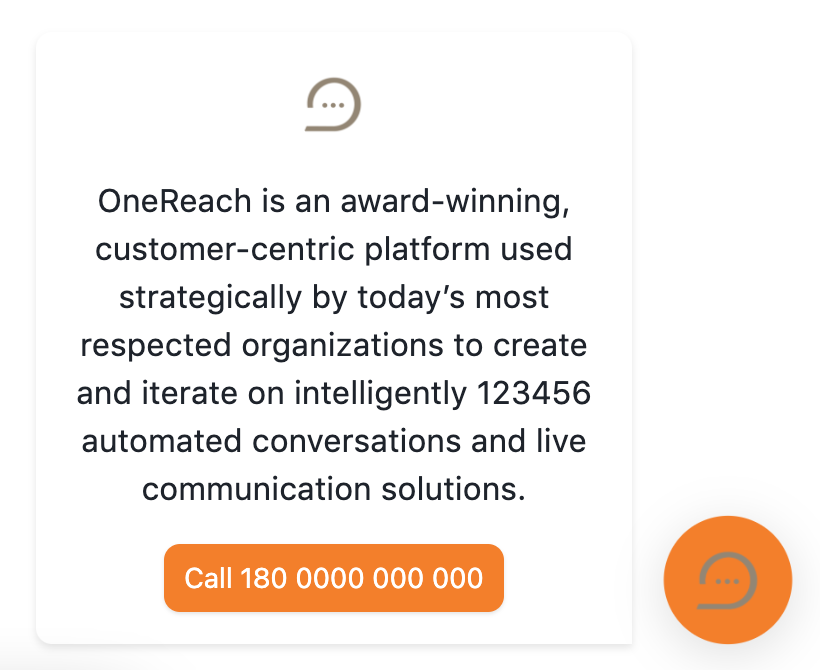
You can add image to your invitation popup.
# Invitation message image initialization code
Example:
{
  inviteImage: 'https://i.vimeocdn.com/portfolio_header/566734',
}
# Button
You can add additional button to popup that will open chat.
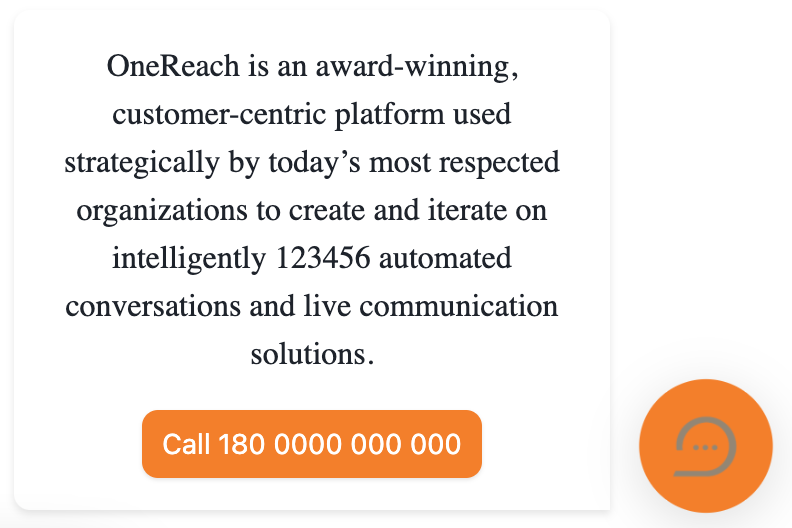
# Invitation message button initialization code
Example:
{
  inviteButton: 'Call 180 0000 000 000'
}
# Invitation message delay duration
The *Invitation message delay duration is the time that the popup waits showing itself. You can define values up to 10 minutes.
Examples of acceptable time formats: 1m 12s or 72s.
# Invitation message delay duration initialization code
When modifying invitation message delay duration in embedded chat init code value should be already transformed to milliseconds.
1m 12s will be 72000 milliseconds
15s will be 15000 milliseconds
Example:
{
  inviteTimeout: 5000
}
# Show icon to close invitation message
By selecting the option, you can allow end-user to close invitation message bubble by showing close icon in top right corner of the popup.
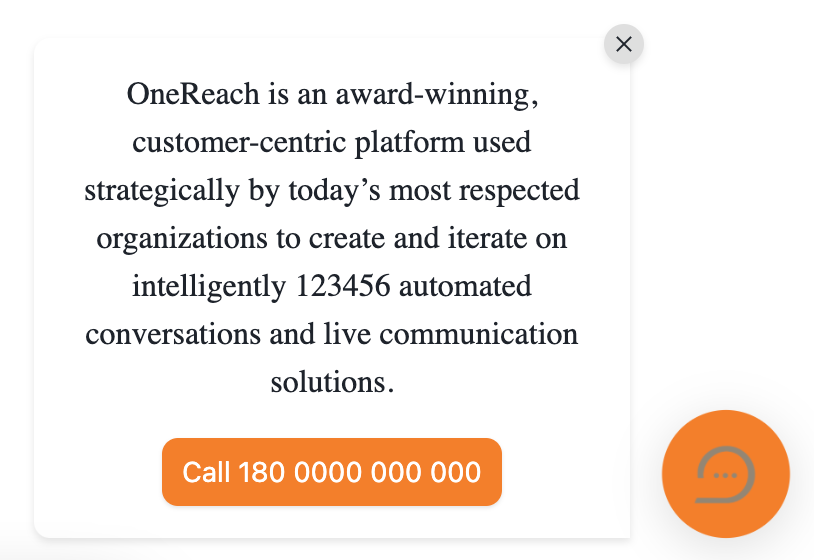
# Icon "Close invitation message" initialization code
Example:
{
  showCloseIcon: true, // show invitiation message close icon
  showCloseIcon: false // hide invitiation message close icon
}
# Window settings
The group allows to setup view and behaviour of embedded chat window.
# Chat window auto-open delay duration
You can set timeout after which chat will be automatically opened. You can define timeout up to 10 minutes. Setting up 0 seconds will make chat window wait until user clicks on widget icon.
Examples of acceptable time formats: 1m 12s or 72s.
# Chat window auto-open delay duration initialization code
When modifying auto-expand timeout in embedded chat init code value should be already transformed to milliseconds.
1m 12s will be 72000 milliseconds
15s will be 15000 milliseconds
Example:
{
  autoExpandDelay: 15000
}
# Allow to change chat window size
Allows user to resize embedded chat by four resizers which can be found on each corner of the chat window.
| Highlighted resizers |
|---|
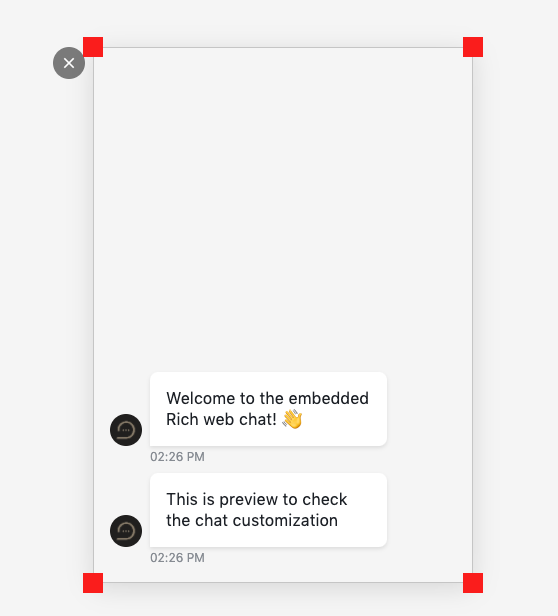 |
TIP
Note that resizers on screen above will be invisible.
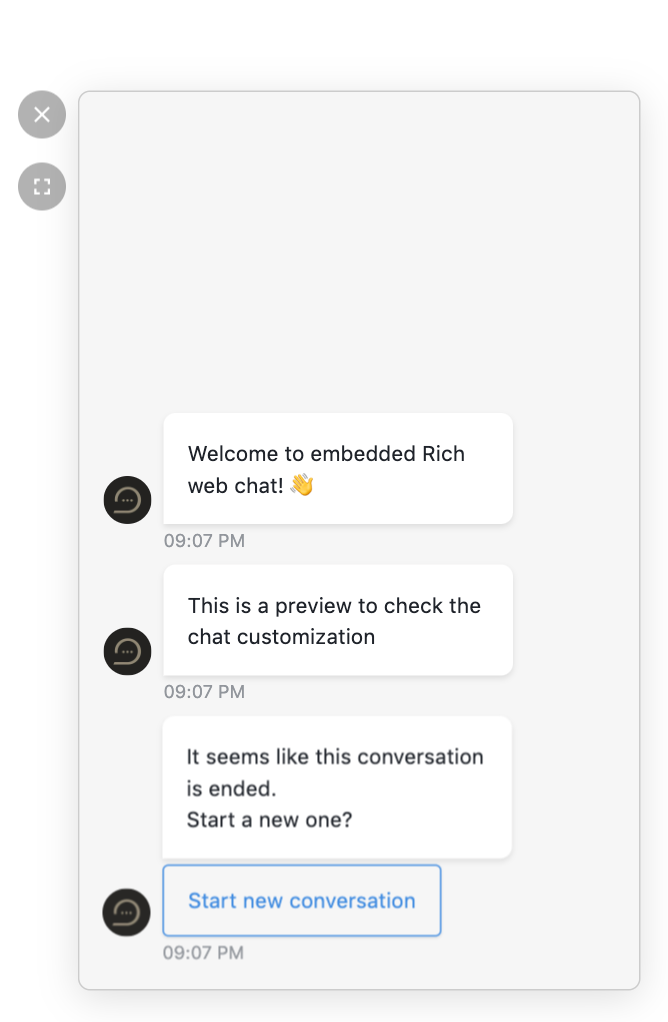
When the toggle is ON, for mobile and tablet view 'resize to fullscreen' button will be added on the left side of chat window. When the chat expanded to fullscreen it can be resized back.
# Allow to change chat window size initialization code
Example:
{
  allowChangeChatWindowSize: true, // resize allowed
  allowChangeChatWindowSize: false // resize is not allowed
}
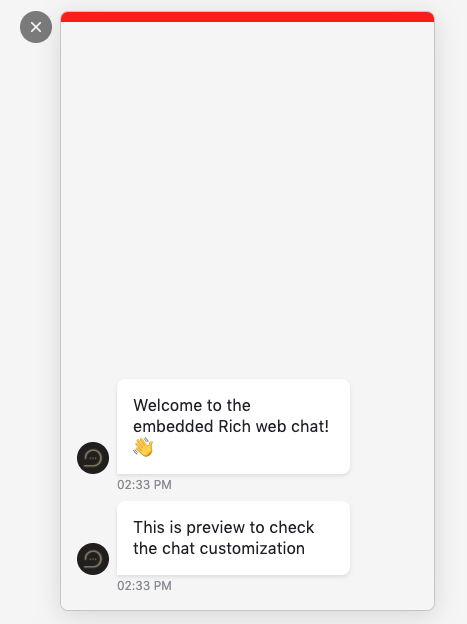
# Allow to drag chat window
Allows to drag chat window within browser window area.
| Highlighted chat window drag zone |
|---|
 |
TIP
Note that drag zone on screen above will be invisible.
# Allow to drag chat window initialization code
Example:
{
  allowDrag: true, // drag allowed
  allowDrag: false // drag is not allowed
}
# Apply blurred background
Allows to enable blurring of chat window background. The effect is the same to Light and Dark themes. On chat window resize or screen position change, background blur will be saved.
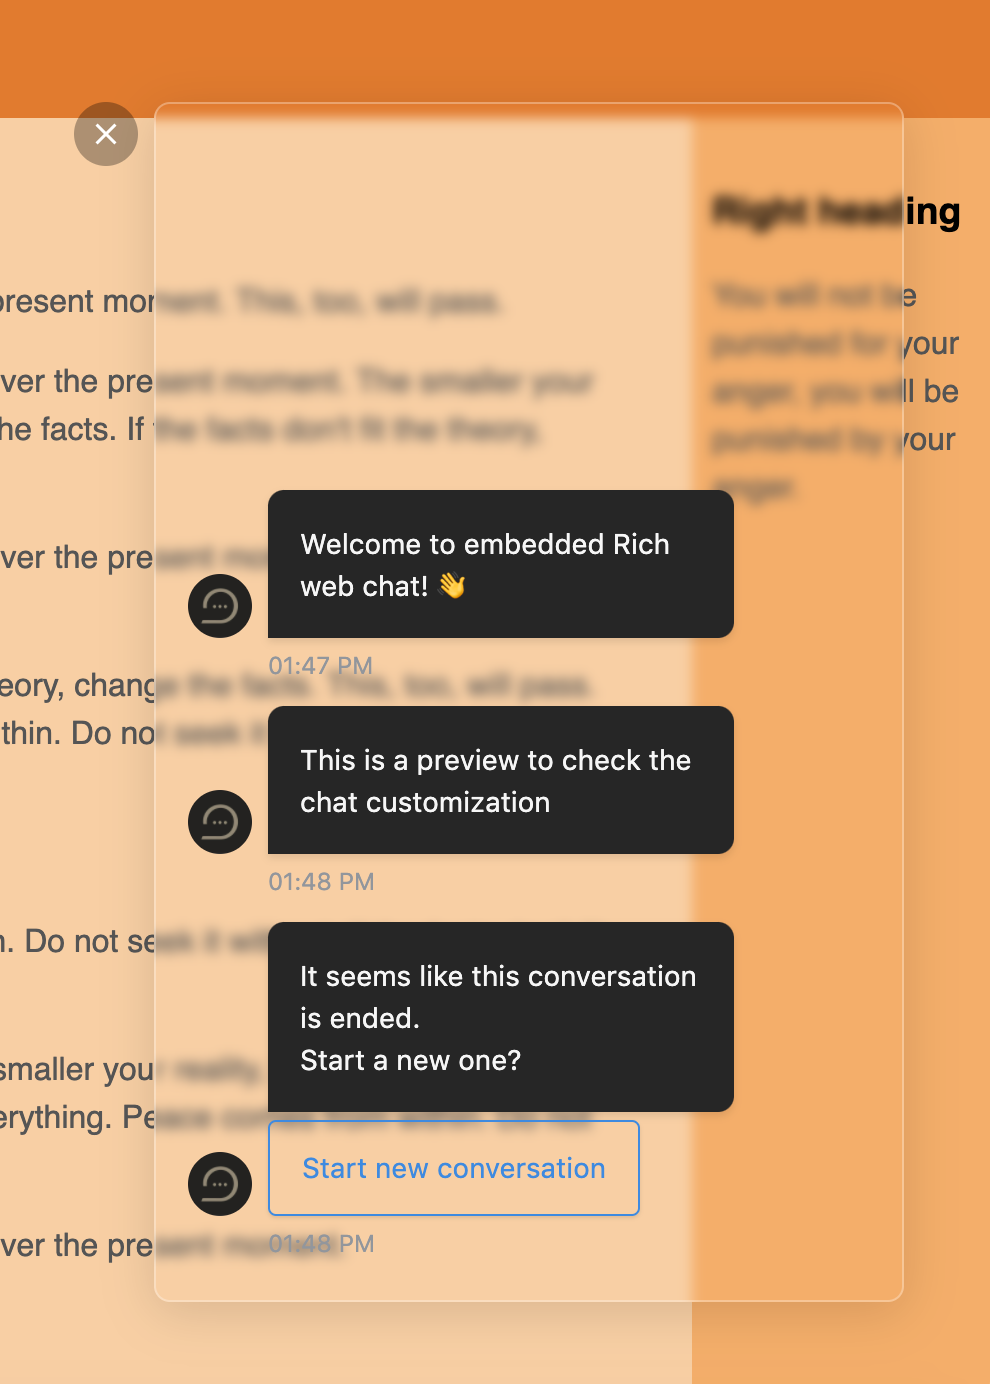
WARNING
Blurred background is not applicable for Firefox browser (90.0.2 (64-bit)
# Apply blurred background initialization code
Example:
appearance: {
       blurredBackground: true
      }
}
# Preview settings
You can test how widget will look on your website by adding a website URL to Preview webpage URL and click on Preview embedded chat button in the step.
# Embed chat with code snippet
In order to embed Rich Web Chat to your website you need to import RWC script & css styles into <head> section of your webpage.
<!-- In <head> add scripts and styles to your html page -->
<script src="https://chat.staging.onereach.ai/lib/richWebChat.umd.min.js"></script>
<link rel="stylesheet" href="https://chat.staging.onereach.ai/lib/richWebChat.css"/>
After that, you need to add code below in <body> section of your webpage. This will be container where RWC will be rendered.
<!-- insert code below into <body> -->
<div id="rwc"></div>
And the last step is RWC chat initialization. Put this script in <head> or <body> section of your webpage, but after scripts & styles imports.
This code will initialize RWC chat into container.
TIP
Note, that container prop should be the same as container ID, in our case container ID is rwc.
<script>
  document.addEventListener("DOMContentLoaded", function () {
    var RWC = richWebChat.default
    if (app) { app.destroy(); }
    var app = new RWC({
      container: '#rwc',
      chatUrl: '',
      autoExpandDelay: 15000,
      position: 'bottom-right',
      inviteMessage: "OneReach is an award-winning, customer-centric platform used strategically by today’s most respected organizations to create and iterate on intelligently 123456 automated conversations and live communication solutions.",
      inviteButton: "Call 180 0000 000 000",
      inviteImage: 'https://i.vimeocdn.com/portfolio_header/566734',
      showCloseIcon: true,
      inviteTimeout: 5000,
      widgetColor: '#F57F17',
      allowChangeChatWindowSize: true,
      allowDrag: true,
      thumbLogo: undefined,
      animation: 'zoom', // 'pulse', 'ring', 'zoom',
      pageData: {
        firstName: 'John',
        lastName: 'Doe'
      }
    })
  });
</script>
# Props for embedded chat
container-<String>(required) DOM element selector where chat will be insertedchatUrl-<String>(required) url of your chat which you can copy on step from RWC URL inputautoExpandDelay-<Number>See more aboutautoExpandDelaypropposition-<String>See more aboutpositionpropinviteMessage-<String>See more aboutinviteMessagepropinviteButton-<String>See more aboutinviteButtonpropinviteImage-<String>See more aboutinviteImagepropshowCloseIcon-<Boolean>See more aboutshowCloseIconpropinviteTimeout-<Number>See more aboutinviteTimeoutpropwidgetColor-<String>See more aboutwidgetColorpropallowChangeChatWindowSize-<Boolean>See more aboutallowChangeChatWindowSizepropallowDrag-<Boolean>See more aboutallowDragpropthumbLogo-<String>See more aboutthumbLogopropanimation-<String>See more aboutanimationproppageData-<Object>Custom object that will be passed to flow
# Passing custom data to flow using pageData prop
In embedded chat snippet you can pass any data to flow by specifing properties in pageData object.
pageData: {
    firstName: 'John',
    lastName: 'Doe'
}
All data will be avaialable in wait for chat step mergefield as a pageData property.
await this.mergeFields['<wait for chat mergefield name>'].get({path: 'pageData.firstName'}); // John
await this.mergeFields['<wait for chat mergefield name>'].get({path: 'pageData.lastName'}); // Doe
Full example of passing props to flow you can find here.
# Full page example with embedded chat
<!DOCTYPE html>
<html lang="en">
<head>
  <meta charset="UTF-8">
  <title>Webpage Title</title>
  <meta name="viewport"
        content="width=device-width, height=device-height, user-scalable=no, initial-scale=1.0, minimum-scale=1.0, maximum-scale=1.0, viewport-fit=cover">
  <meta charset="utf-8" />

  <script src="https://chat.staging.onereach.ai/lib/richWebChat.umd.min.js"></script>
  <link rel="stylesheet" href="https://chat.staging.onereach.ai/lib/richWebChat.css"/>

</head>
<body>
  <div id="rwc"></div>

  <script>
    document.addEventListener("DOMContentLoaded", function () {
      var RWC = richWebChat.default
      var app
      if (app) { app.destroy(); }
      var app = new RWC({
        container: '#rwc', // DOM element selector where chat will be inserted
        chatUrl: '', // url of your chat. required
        autoExpandDelay: 15000,
        position: 'bottom-right',
        inviteMessage: "OneReach is an award-winning, customer-centric platform used strategically by today’s most respected organizations to create and iterate on intelligently 123456 automated conversations and live communication solutions.",
        inviteButton: "Call 180 0000 000 000",
        inviteImage: 'https://i.vimeocdn.com/portfolio_header/566734',
        showCloseIcon: true,
        inviteTimeout: 5000,
        widgetColor: '#F57F17',
        allowChangeChatWindowSize: true,
        allowDrag: true,
        thumbLogo: undefined,
        animation: 'zoom', // 'pulse', 'ring', 'zoom',
        pageData: {
          firstName: 'John',
          lastName: 'Doe'
        }
      });
    });
  </script>
</body>
</html>
# Global commands setup 🌐
In order to include global commands to your chat, turn on the toggle Setup global commands in Global commands setup collapsible.
TIP
Note, that global commands that re-route the flow to a specific leg through Process Global Commands (RWC) step will work work only when conversation is not ended or timed-out. Otherwise user will recieve notification that session is expired.
This logic does not apply for global commands that are link, JavaScript code or Restart conversation option
# Add button to restart conversation
When selected, it doesn't have additional setup. On client shown as 'Reload' icon with label 'Restart conversation'. On end-user click conversation will be restarted, without showing a dialogue message to 'Start new/Continue' conversation.
# Process chat close event (browser page close and page refresh)
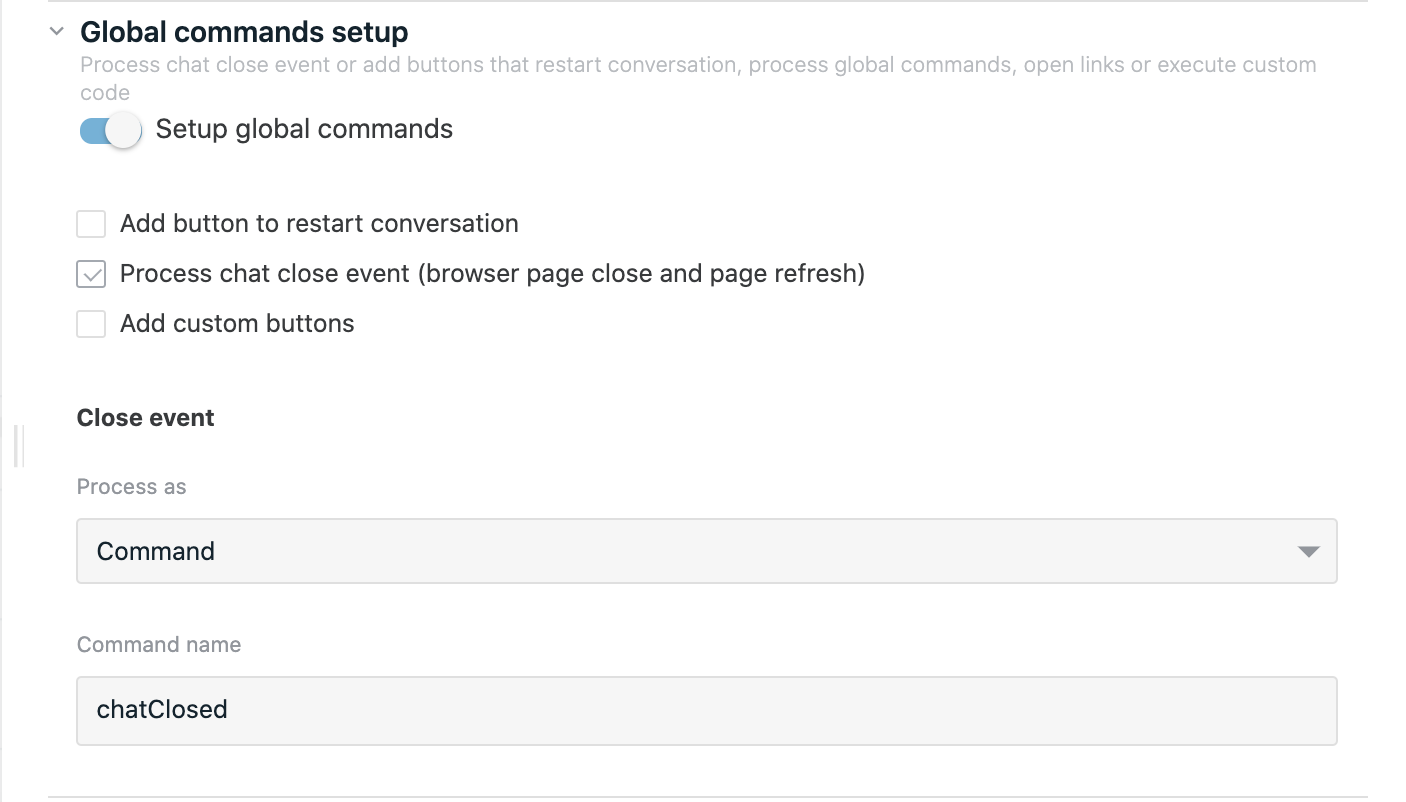
Processes chat close event, sent on browser page close or refresh, app close. When the option is selected, user may choose how the event will be processed - by a command (and routed fo Process Global Commands (RWC) step leg) or by JavaScript code (code executed on chat client).
# Process as command
The option allows to process close event on client (browser tab closing or tab refresh), by re-routing flow to a specified leg in Process Global Commands (RWC) step. For processing close event, leg name should be defined in Close event command name input.
TIP
In order to add leg to Process Global Commands (RWC) step you have to add command name (from Close event command name input on Wait for Chat(RWC) step) to Command name input o step Process Global Commands (RWC). Command name can be different than name on screen below.
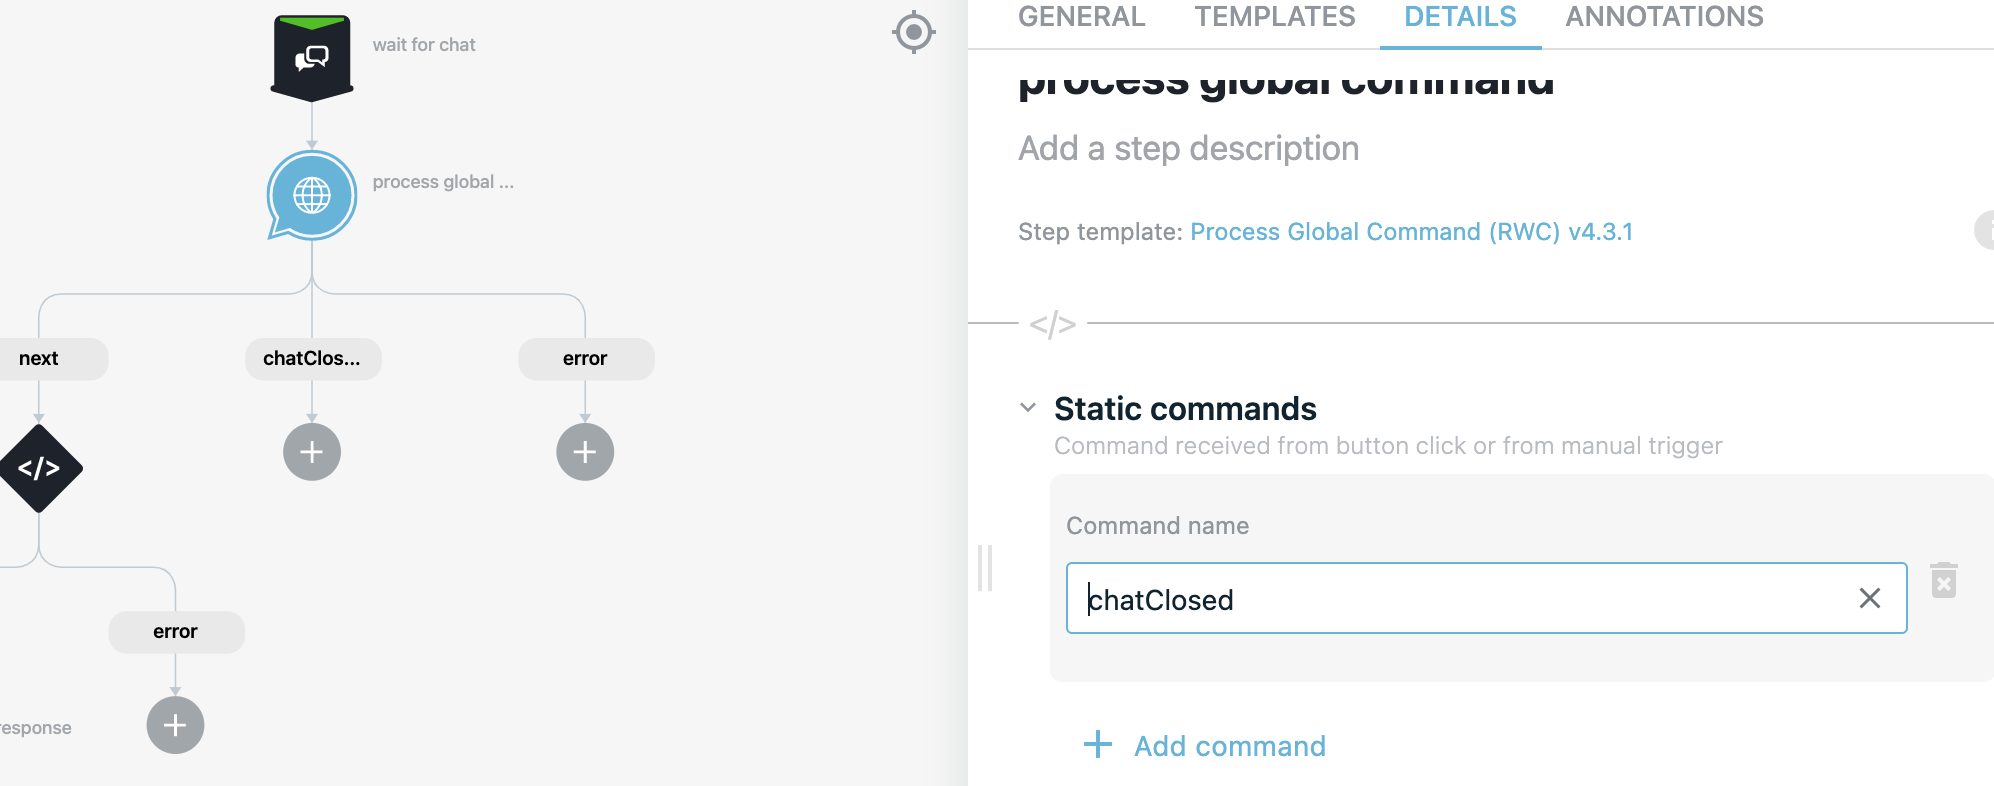
When user closed a chat before conversation was ended, the flow will proceed through chatClosed leg.
TIP
Process Global Commands (RWC) step might be added in flow right after Wait for Chat (RWC) step to show commands on client once the chat loaded and throught entire conversation. To show global commands after some messgaes in chat, add step Process Global Commands (RWC) to the flow, so commands will be available in chat once the step executed and proceed by next leg.
# Proces as JavaScript code
Executes given JavaScript code on client just before browser/tab close or page refresh.
WARNING
JavaScript will not be executed if client force closed browser.
When using JavaScript code for handling flow will not go through leg in Process Global Commands (RWC) step.
# Add custom buttons
Th option allows to create custom buttons in chat menu and handle it with Process Global Commands (RWC) step leg, or with redirect to other source, or with JS execution on client.
When the option is selected, a custom button might be added by click to + Add custom button. Then additional inputs will be shown to define custom global command button. User can add any amount of custom buttons with unique Command name.
Icon input uses Materials icons, all supported icons you can find here (opens new window)
# Command
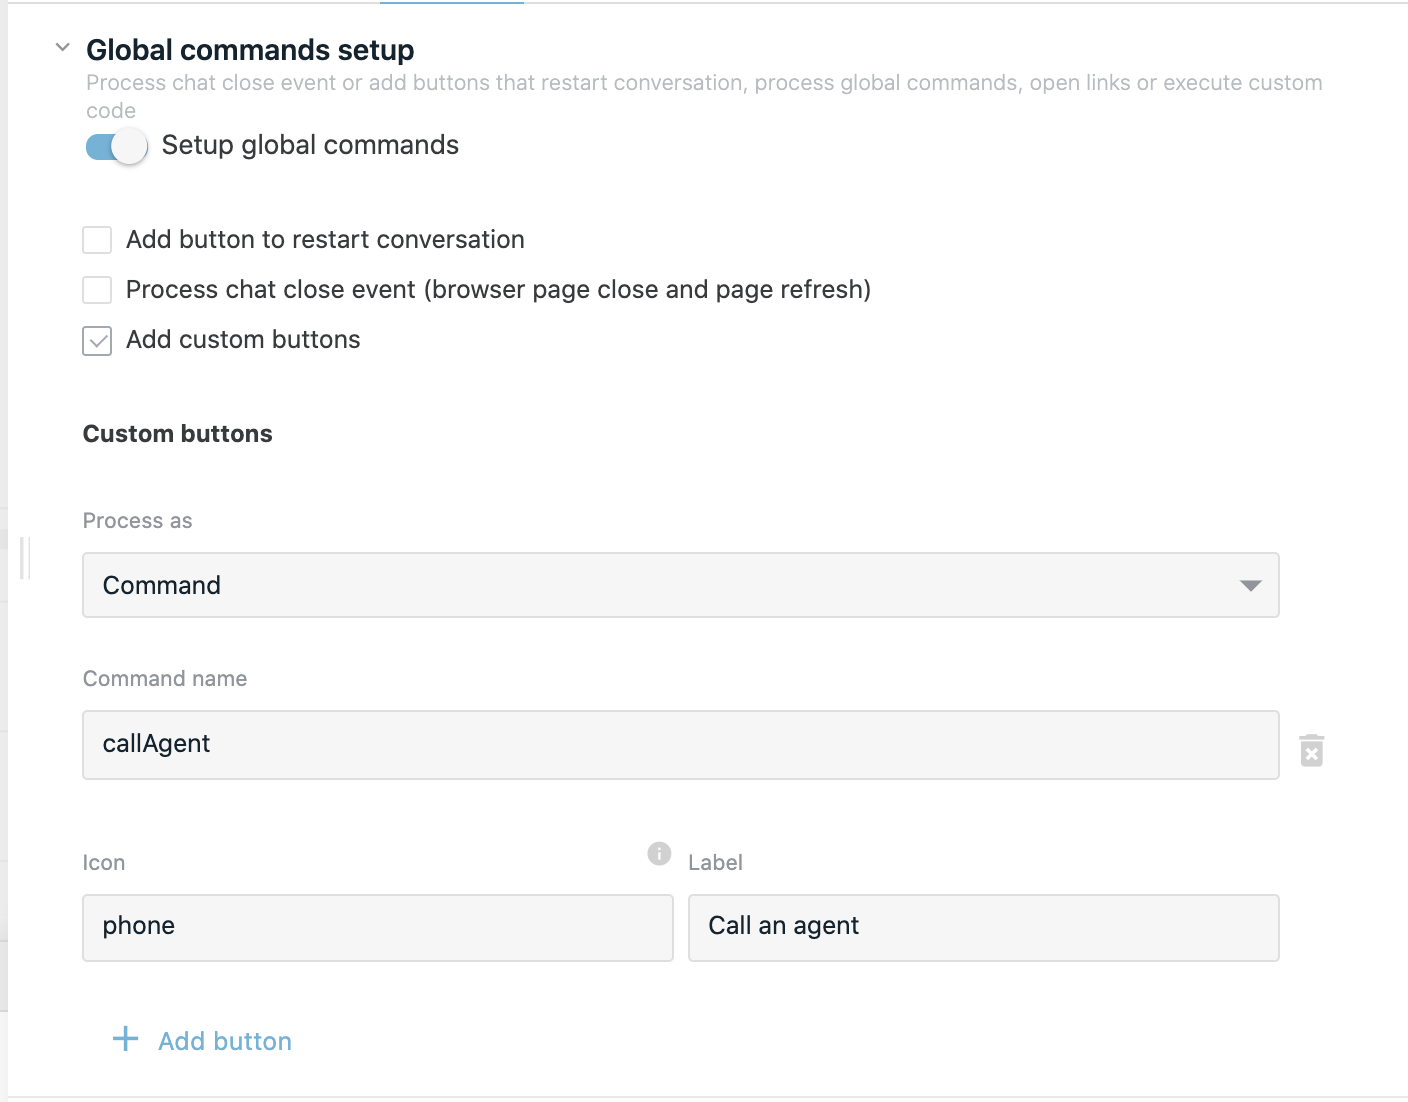
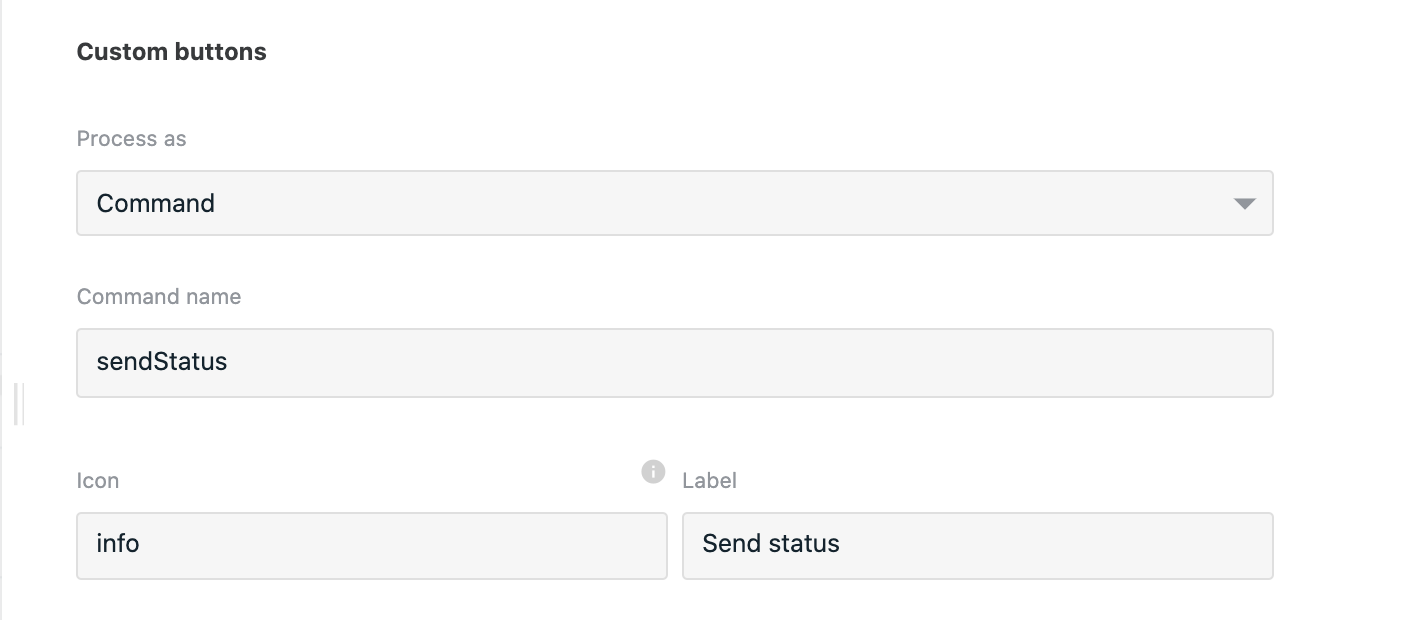
If option to process as a Command is selected, then command name, icon and label are required. Command must contain only letters and digits. For correct command processing, command name in Wait for Chat (RWC) step should match command leg name in Process Global Commands (RWC) step. Icon can be selected from material icons resource and set as icon name (e.g. question_answer). Label will be shown on client as name to a command.
TIP
If you add Process Global Commands (RWC) step after any RWC step (except Wait for Chat (RWC) step) Global commands that re-route flow to a specific leg will not appear in chat. If you want to show such global commands throught entire conversation consider adding Process Global Commands (RWC) step right after Wait for Chat (RWC) step or before any step that sends message.
# Wait for Chat step (RWC)
# Process Global Command (RWC) step

# Button
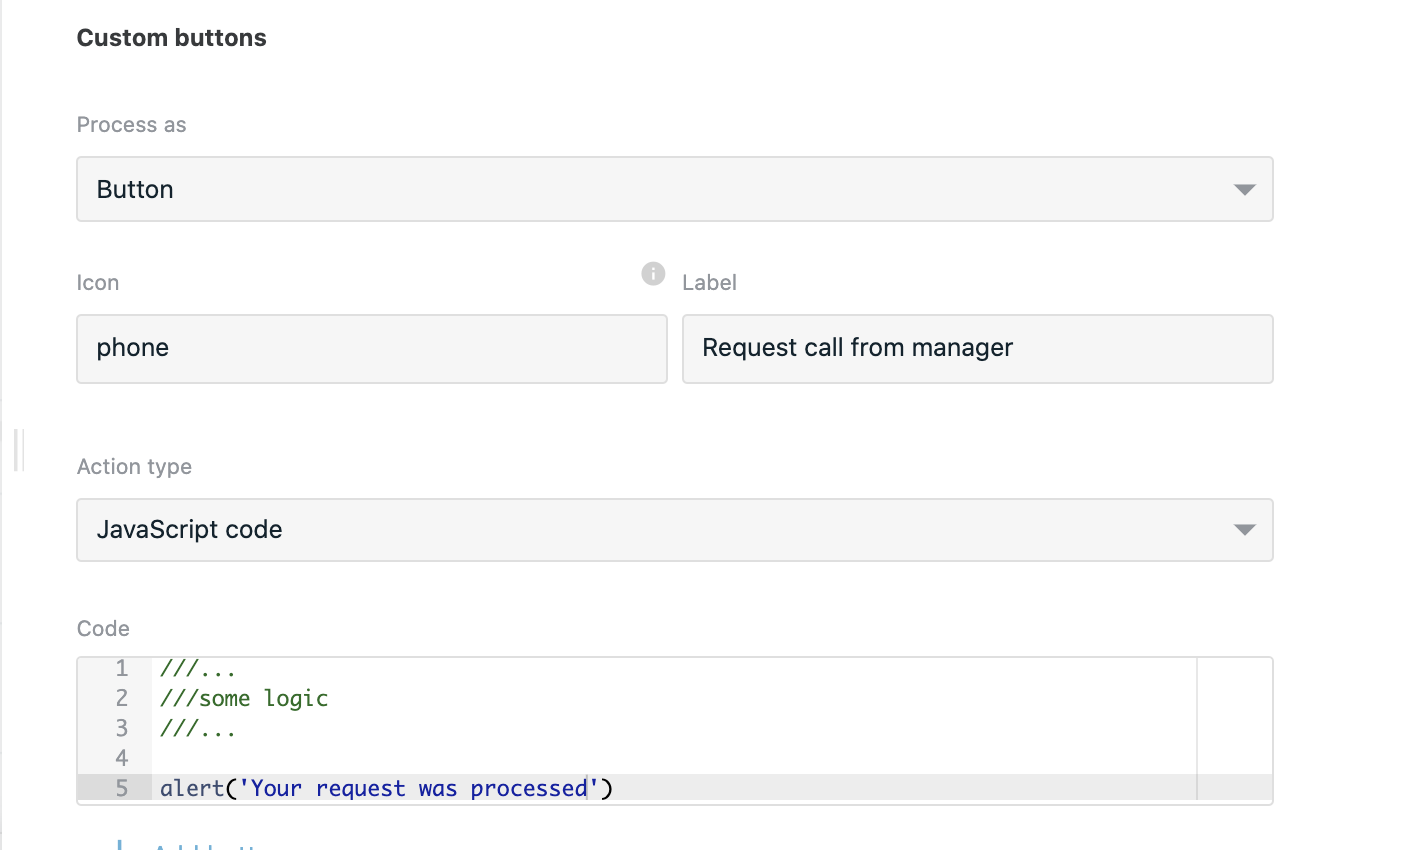
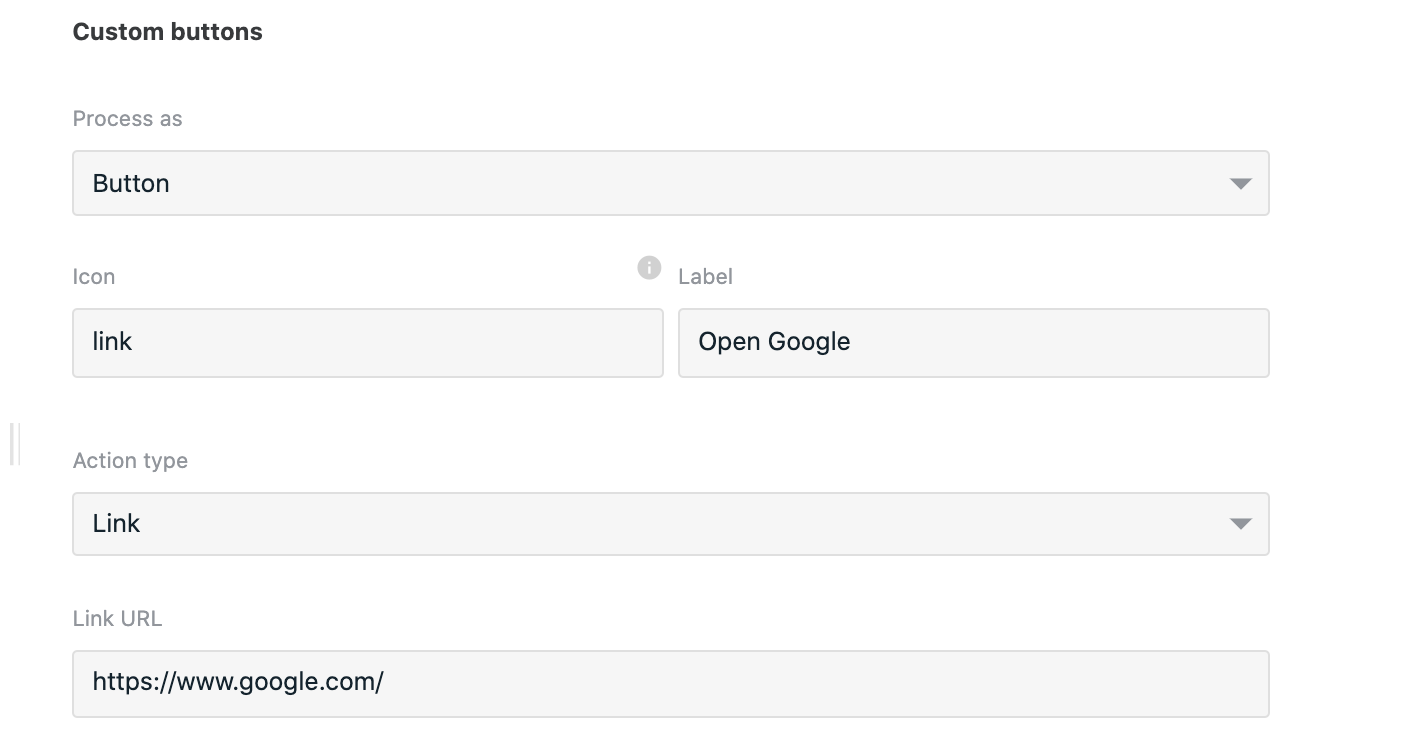
Custom command can also be processed as a Button, that doesn't require Process Global Commands (RWC) step setup. If Button option is selected, icon and label inputs are present as well and required. Icon can be selected from material icons resource and set as icon name (e.g. question_answer). Action type can be selected: a link or a JavaScript code (code is executed on client).
# JavaScript
After button icon & label was set (see above) select JavaScript code in Button type dropdown and specify JavaScript code that will be executed on button click.
# Link
After button icon & label was set (see above) select Link in Button type dropdown and specify URL in Link URL input.
# Example:
# Global commands preview
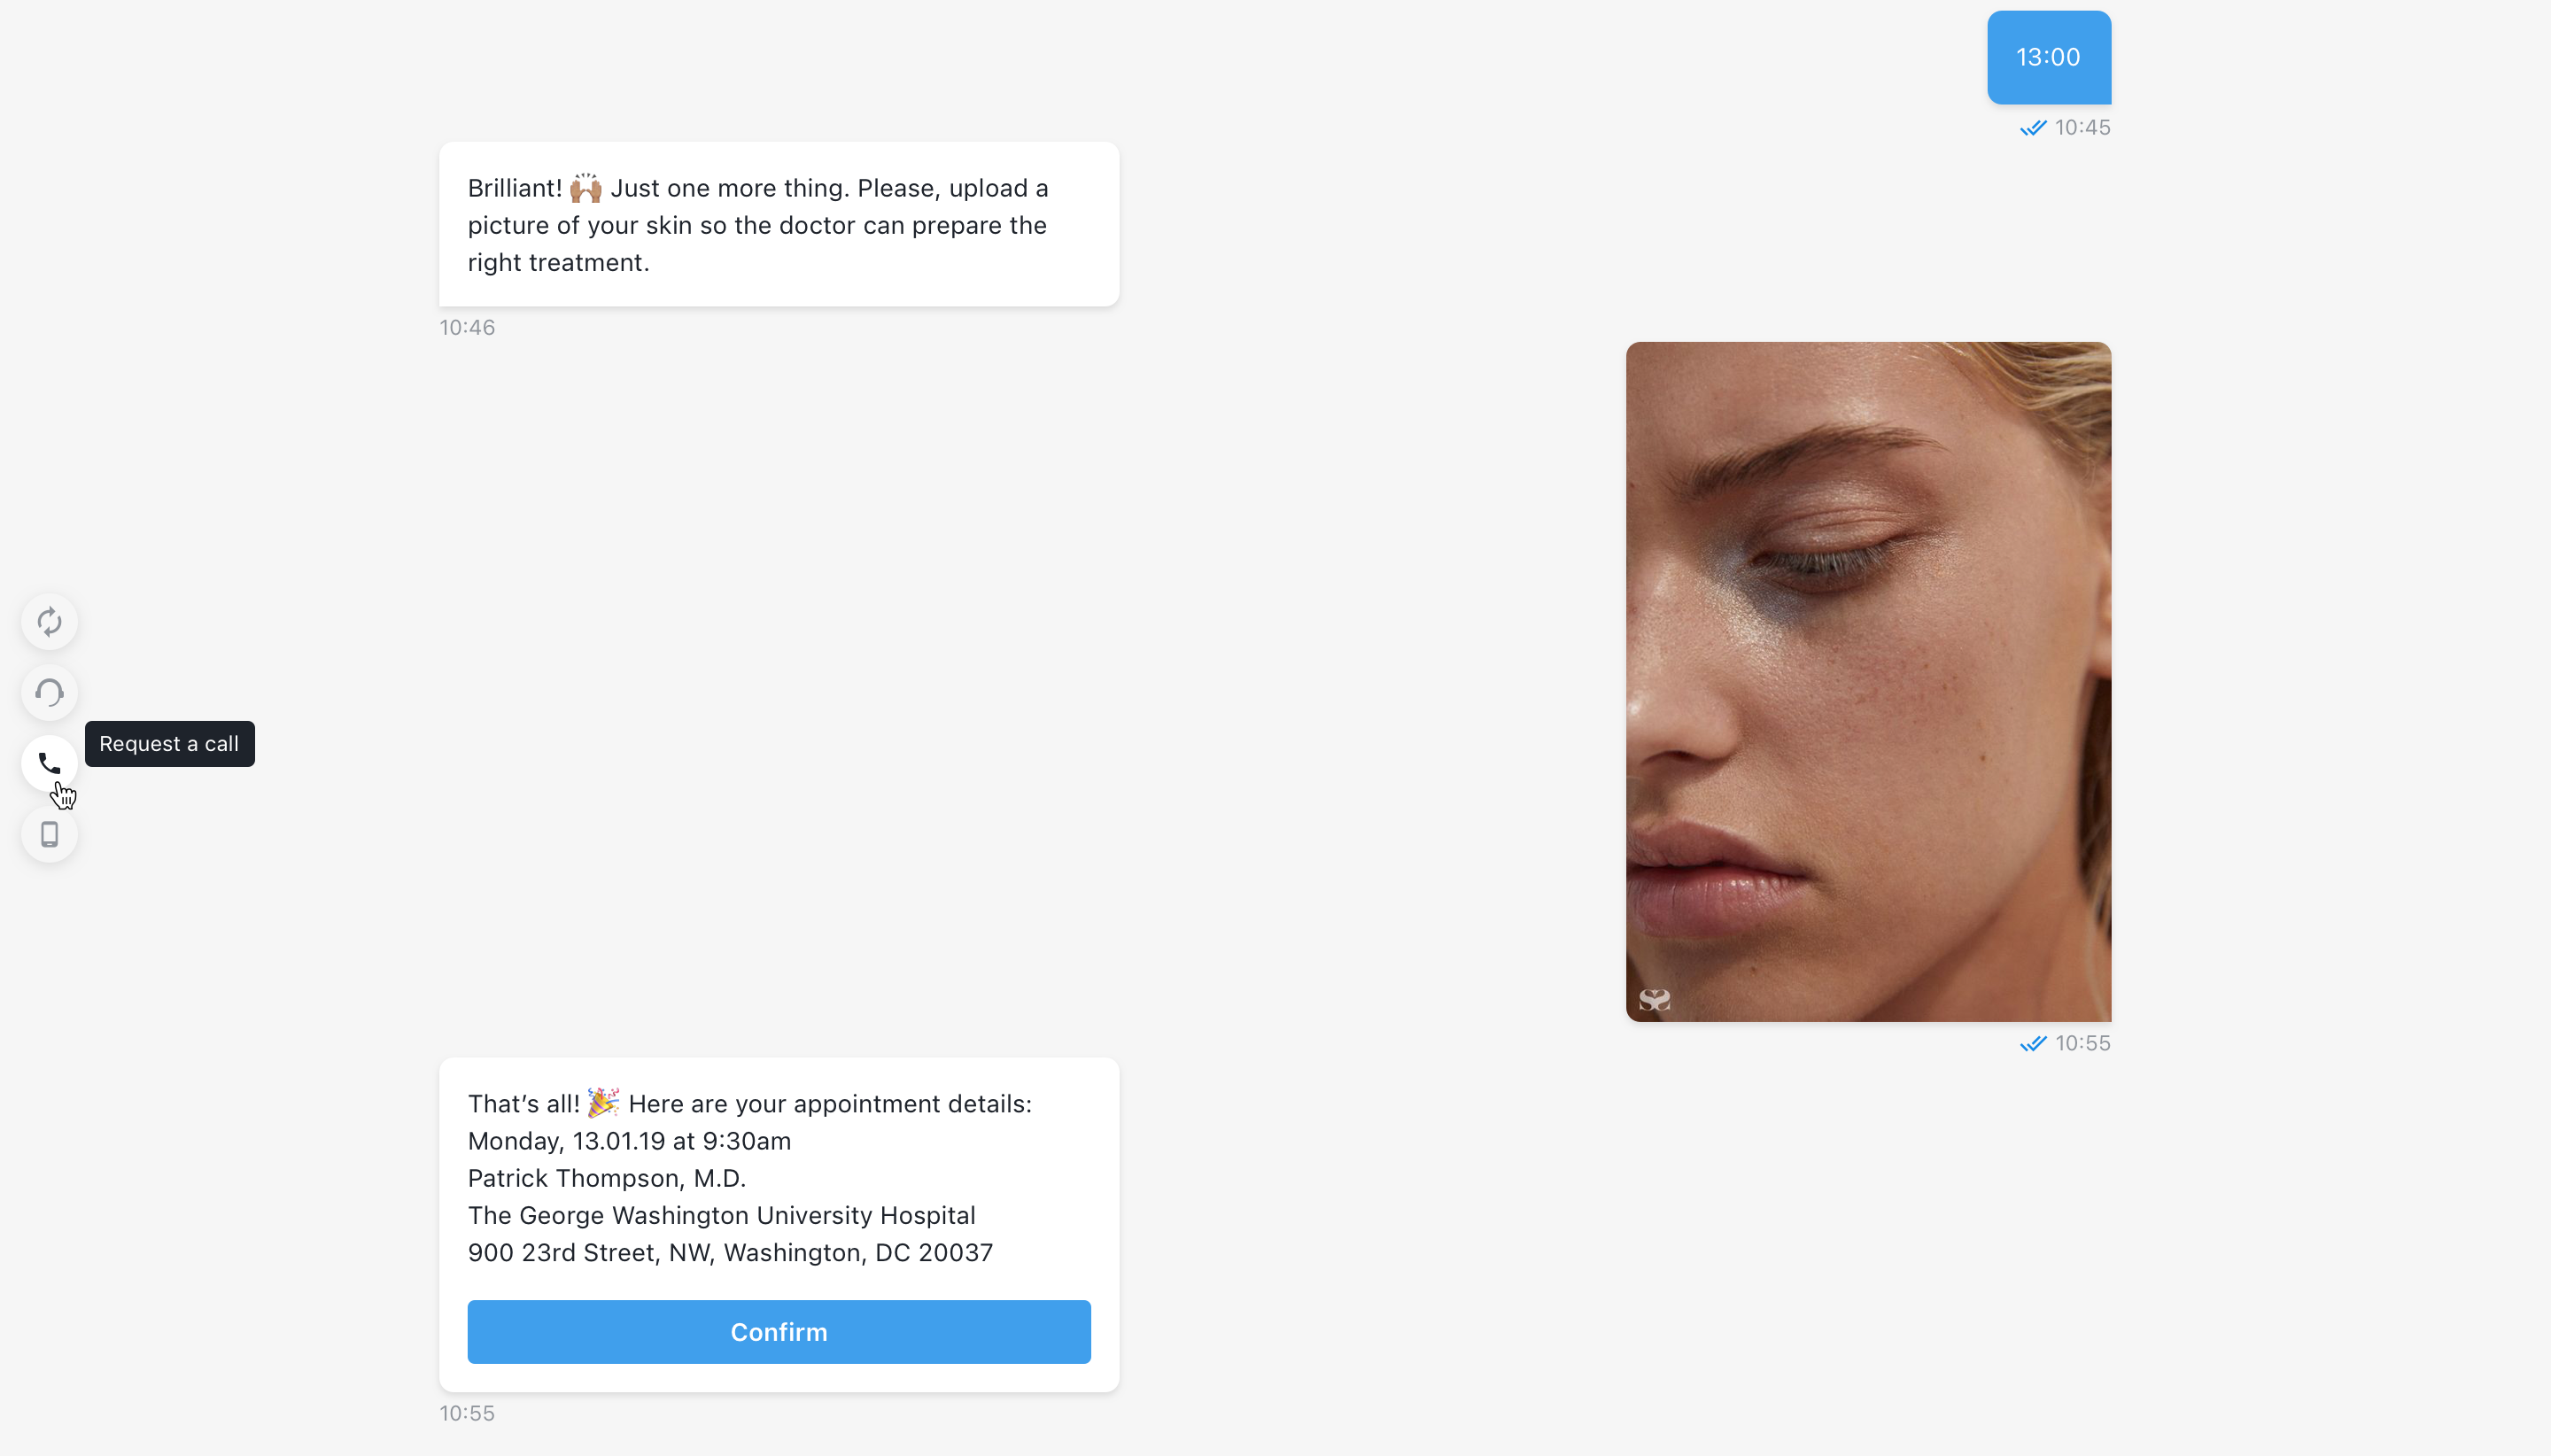 | 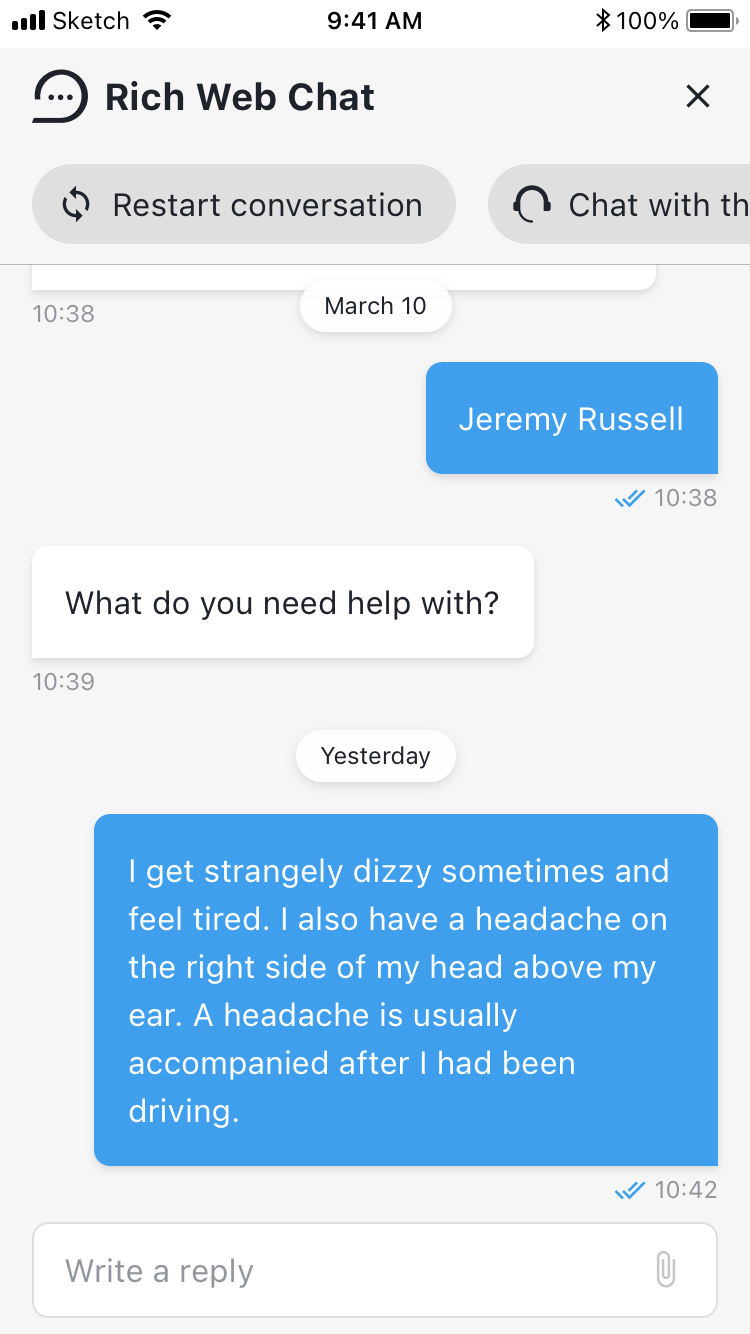 |
|---|
# Text commands TODO: add example of processing text command and button command with the same leg
Text commands can be set only in Process Global Commands (RWC) step, in Text Commands section. If global command and text input trigger needs to be re-routed with Process Global Command step, the button must be defined in Wait for Chat (RWC) step and command name set in a Text command input.
# Returning to main thread
When clicking on global command button flow re-routes to a global command leg in Process Global Commands (RWC) step and creates new thread, after all logic is done you need to return to main chat thread, in order to do that you need to use Return to Main Thread (RWC) step that will re-route flow back to the point where user left off the main conversation, otherwise conversation will be ended.
# Advanced settings 💡
# Use custom css TODO: write better explanation how to use custom css
Turn on the respective toggle and choose the file(s) with CSS for your chat via Files or provide it as a link using http:// or https://. Note that in order to use a CSS file stored in an external cloud service you need to indicate the link for downloading that file.
TIP
You can access default chat CSS variables to adapt for both light & dark mode.
Color variables
--c-primary: rgb(23, 138, 231);
--c-milk: rgb(233, 233, 233);
--c-silver: #dfdfdf;
--c-light-grey: #f6f6f6;
--c-dark-grey: #91969d;
--c-white: #fff;
--c-black: #1e232b;
--c-coal: #262626;
--с-light-coal: #353535;
--c-dark: #161616;
--c-zero: #000;
--c-zero-01: rgba(0, 0, 0, 0.1); // due to safari issue
--c-zero-015: rgba(0, 0, 0, 0.15);
--c-white-025: rgba(255, 255, 255, 0.25);
--textColor: var(--c-black);
--textColorInvert: var(--c-white);
--bodyBackground: var(--c-light-grey);
--messageBackground: var(--c-white);
--shadowColor: var(--c-zero-01);
--timeColor: var(--c-dark-grey);
--rwcTheme: var(--c-primary);
--sliderRailColor: var(--c-milk);
--borderColor: var(--c-silver);
--pickerBackground: var(--c-light-grey);
--pickerTogglerColor: var(--c-dark-grey);
--pickerTogglerActiveColor: var(--c-black);
--dateToday: var(--c-light-grey);
--headerBorderColor: var(--c-zero-015);
--fileItemBackground: var(--c-light-grey);
# Dark mode
In dark mode some variables will change color.
--textColor: var(--c-light-grey);
--messageBackground: var(--c-coal);
--bodyBackground: var(--c-dark);
--sliderRailColor: var(--с-light-coal);
--borderColor: var(--c-light-coal);
--pickerBackground: var(--c-coal);
--pickerTogglerColor: var(--c-dark-grey);
--pickerTogglerActiveColor: var(--c-white);
--dateToday: var(--c-dark-grey);
--headerBorderColor: var(--c-white-025);
--fileItemBackground: var(--с-light-coal);
# Use custom message time format
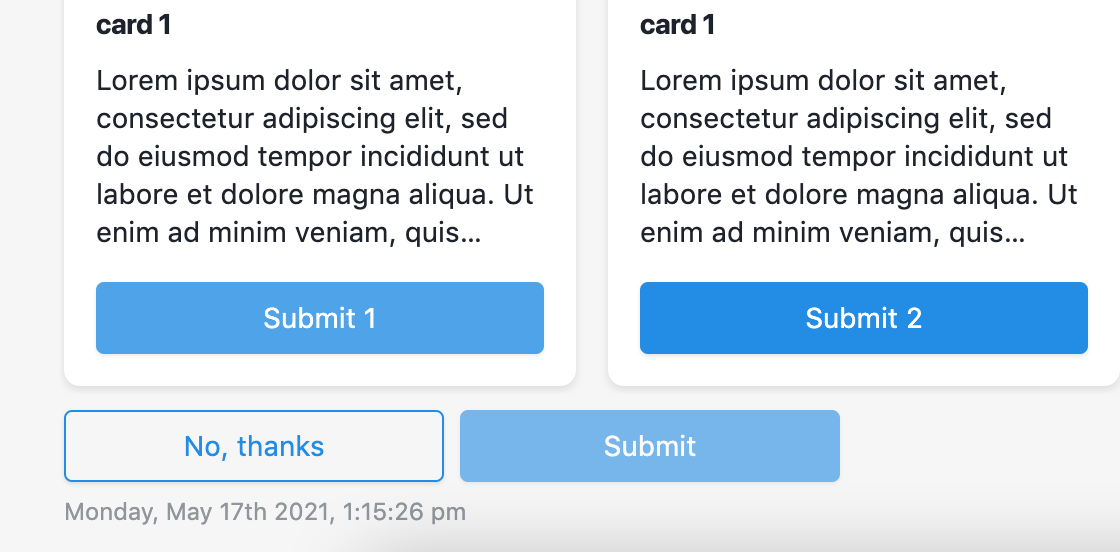
Changes message time format. Takes a string of tokens and replaces them with their corresponding date/time values.
For example:
hh:mm A->01:10 PMdefaultdddd, MMMM Do YYYY, h:mm:ss a->Monday, May 17th 2021, 1:11:51 pmddd, hA->Mon, 1PM
TIP
For additinal information about time formatting visit Moment JS Date Format documentation (opens new window) page.
# Customize header
Allows to add custom styles and scripts for header or completely change header appearance.
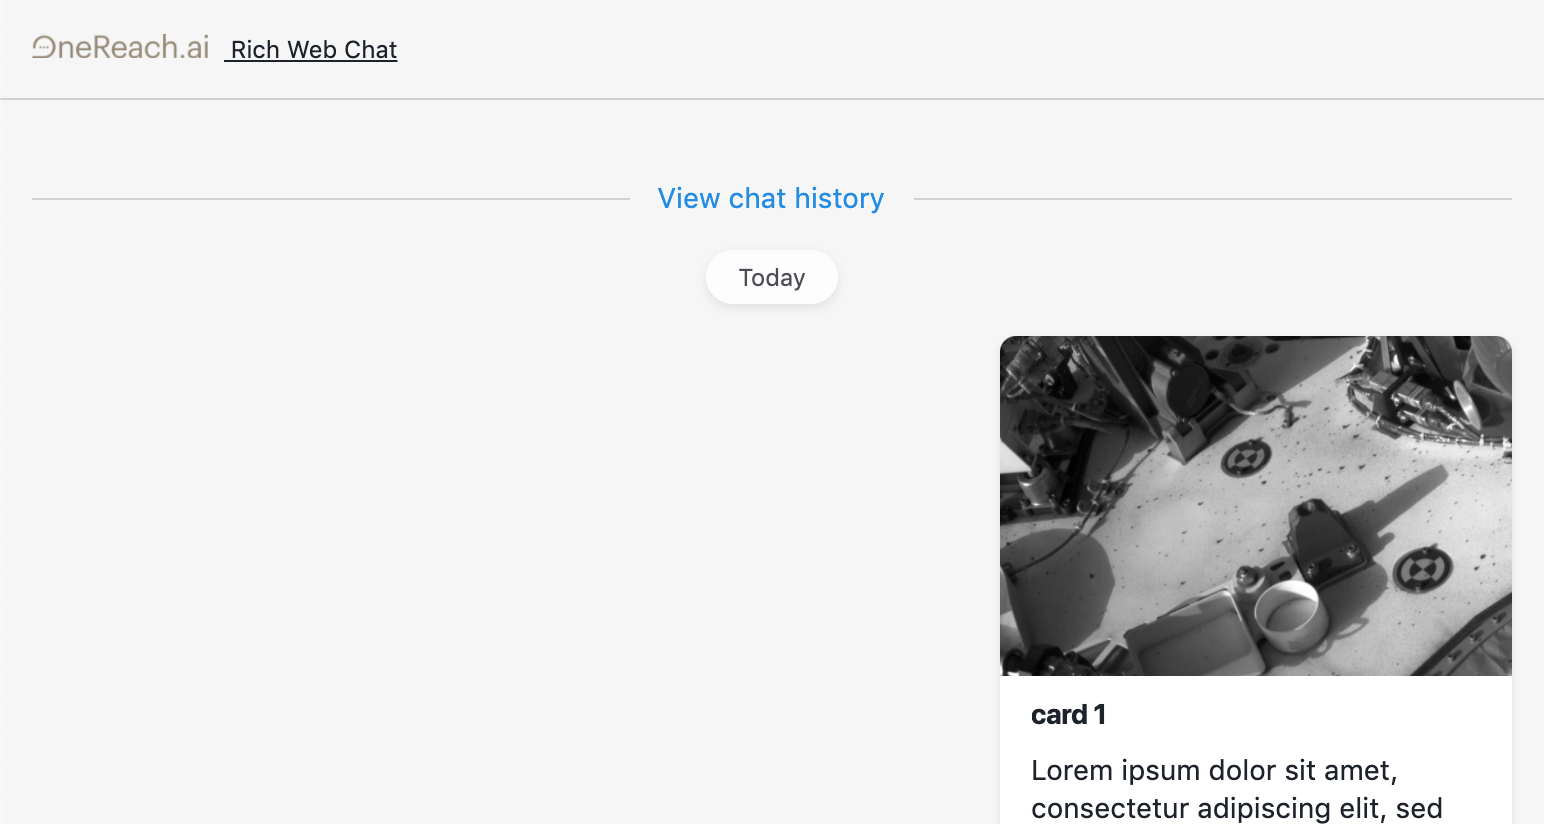
TIP
When leaving HTML input empty chat will have default header that can be set in Chat title, Chat description and Header image inputs in Look and feel collapsible.
TIP
CSS styles for header also can be specified when using Custom CSS
TIP
Header JavaScript code will be appended right before </body> tag and executed after chat was loaded and before footer JavaScript code.
# Customize footer
Allows to add custom footer for chat.
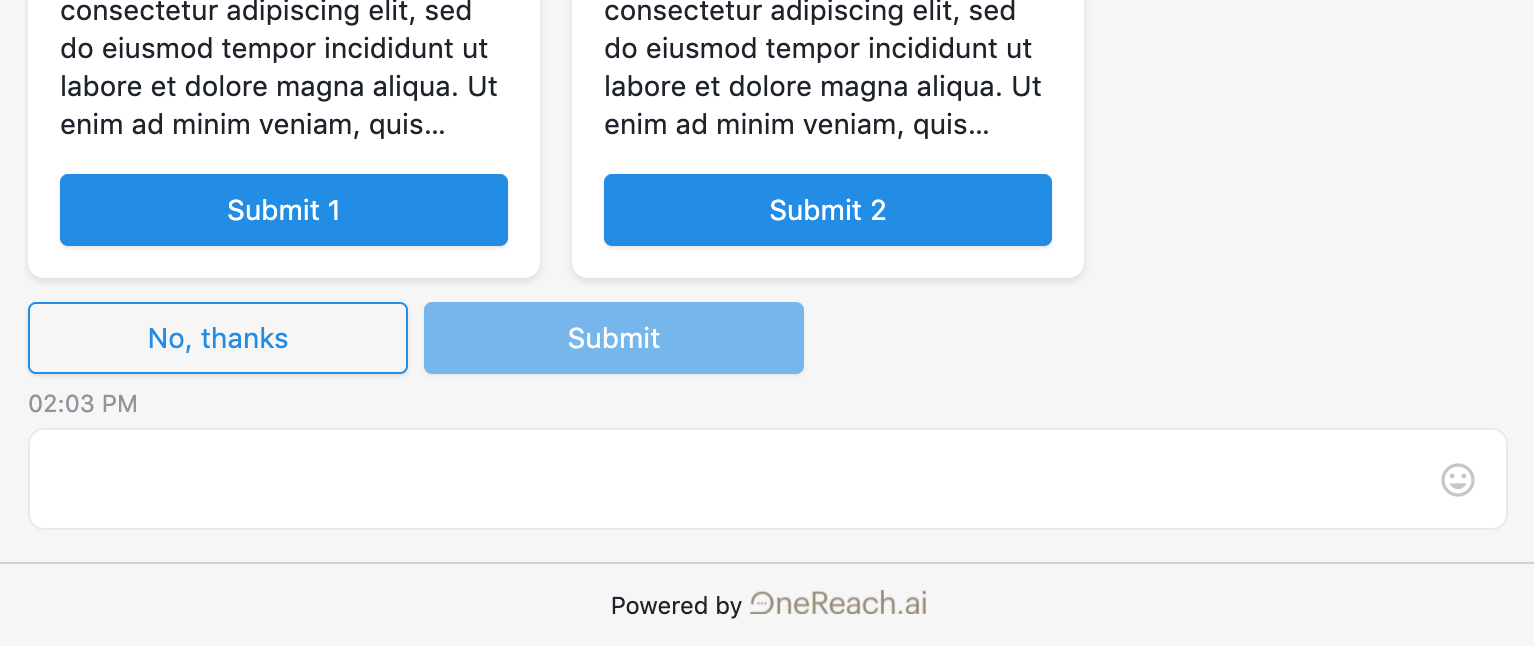
TIP
CSS styles for footer also can be specified when using Custom CSS
TIP
Footer JavaScript code will be appended right before </body> tag and executed after chat was loaded, but after header JavaScript.
# Show footer at
Allows to hide footer depending on user device.
- Desktop - show footer in Desktop devices or devices with large resolution;
- Mobile - show footer on mobile devices or devices with small resolution;
- Embed - show footer in embedded chat.
# Extend page <head> by custom template
In order to extend page <head> you need to turn on Extend page <head> by custom template switch in Advanced settings collapsible group.

Allows to inject custom scripts or meta tags into the <head> tag of the chat page.
For example:
<meta name="keywords" content="OneReach, RWC, Chat">
<script>
  console.log('Hello from head script!');
</script>
Will append script with console.log and meta tag to <head>:

TIP
If template has JavaScript code it will be executed after header & footer Javascript code.
# Add merge field variable from client
Allows to specify list of custom variables which will be added to customVariables step merge field data.
Variable name- JavaScript variable name that will be added to merge field data;Value from script execution- JavaScript code that will be executed when user opened chat (in client browser). Should return value.
The expression in Value from script execution will be evaluated in the client browser and value will be passed into the flow. After that Wait for Chat (RWC) merge field will have this value in <mergefield name>.customVariables.yourVariableName.
# Example:
Add variable
loadTimestampand function that returns current timestampreturn Date.now()
Use step merge field variable in another step
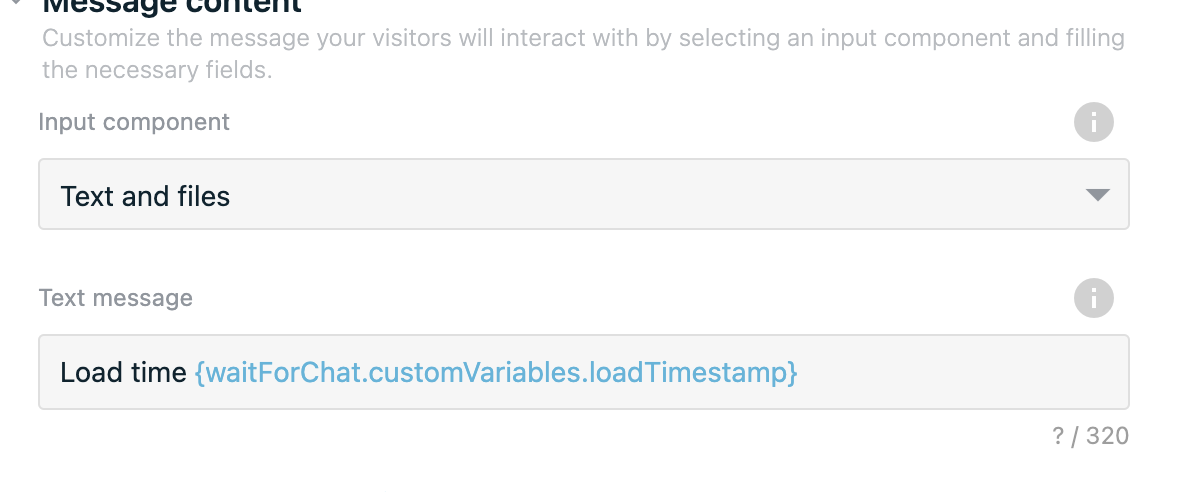
Result: message with timestamp that was executed when user opened chat

# Control conversation manually
When the toggle is turned on, the event of conversation end won't be sent to chat client, so the chat session will be active till flow session timeout or till event is sent manually with a step End conversation (RWC).
The option allows to use step Trigger Another Flow and Proceed in RWC flow, so the conversation thread won't concure.
# Merge field variables and settings
The output data of the step will be stored under the name provided in the merge field name. The following properties are returned: the chat URL, the ID of the current session, the bot answer delay duration and the information about visitor’s device and browser, as well as additional query parameters and headers of the request. See below the structure of the merge field object:
{
   "answerDelay":"String",
   "appId":"String",
   "browserFingerprint":"String",
   "context":"Object",
   "customVariables":"Object",
   "deviceId":"String",
   "headers":"Object",
   "pageData":"Object",
   "queryParams":"Object",
   "rwcUrl":"String",
   "sessionId":"String",
   "userTimezone":{
            "offset":"Number",
            "name":"String"
 }
Description:
answerDelay- bot answer delay duration.
Example: 2 secondsappId- OneReach.ai Apps identificatior. The same value is returned if the chat opened in browser, apps, embedded views.
Emample: wgp3zpnqss-k7ritsrlhyq.apps.staging.onereach.aibrowserFingerprint- unique hash to recognize a particular end-user based on user's browser, settings, OS.
Example: b39d51626afc98dbce88275f22e36f24context- data, that might be sent with in-app notification with step template Send Notification (Apps).customVariables- variables defined in Extend page<head>by custom template section. More about this you can find here.
Example:
{
  customVariable: 'some value',
  customNumber: 123456789
}
deviceId- variable has value only when chat opened within OneReach.ai Apps application. If chat opened in browser or embedded view, deviceId will beundefined. Value is the same for all chats, added in OneReach.ai Apps within a device. If app was reinstalled, deviceId will be changed.
Example: VByfKmz-TE2wsfkoAjwvIwheaders- HTTP response headers, that are included with the data being sent back to the client to instruct the browser to do something or for informational purposes.
Example:
{
   "cache-control": "no-cache",
   "content-length": "1681",
   "content-type": "application/json; charset=utf-8"
}
pageData- more information about this prop you can find here.queryParams- defined set of parameters, added to the end of a url in format?a=1&b=2. If added, it will be stored in merge field as objects array.
Example:
{
   "a": "1",
   "b": "2"
}
rwcURL- full RWC URL.
Example: https://chat.staging.onereach.ai/IHWZ7wApT4qVlTr9cdFTkg/0z4xmz7sessionId- uuid of a main RWC flow (beginningSessionId).
Example: 57a73403-2e70-4fcd-bb39-5bfbed6eefebuserTimezone- timezone of the user that opened chat.
Example:
{
  offset: '+3',
  name: 'Europe/Kiev'
}